Sometimes a smell or sound or even a color will immediately remind you of something. This was the sensation I got when I saw this beautiful icy blue Astrobright cardstock called Lunar Blue from CutCardStock. I immediately thought of the Disney movie, Frozen. It's just that perfect shade of blue that looks so fantastic with silver accents.
It's been a while since I made rosettes but I saw a rosette wreath that was posted by Nancy Borgschulte on Facebook and it inspired me to make one of my own with this beautiful blue card stock.
Rosettes are simple to make. All you need to do to begin is cut strips of cardstock at the lengths you need. These are often longer than even 12 x 12 paper so you usually need to glue paper strips together. Since I needed 8 strips at 18" and 8 more at 12", I decided to glue my paper together before I cut the strips. Here I connect two sheets of cardstock with a 1/4" glue joint, overlapping 1/4".

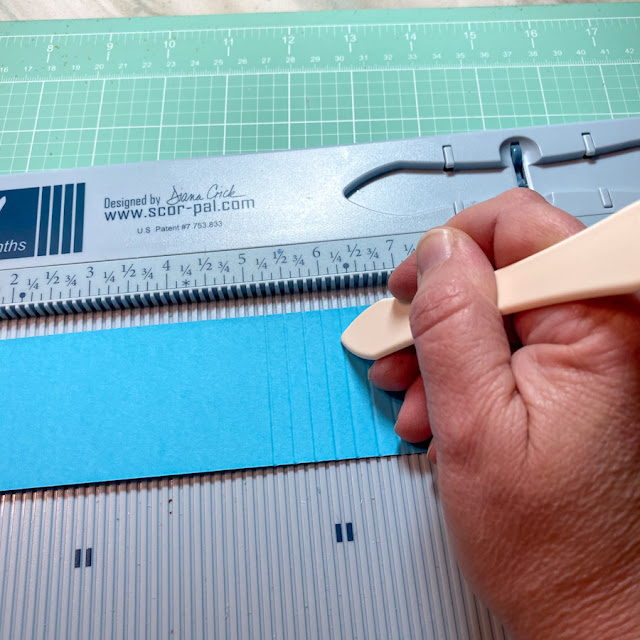
I don't have a cutter that can cut over 15" so I used a finger blade and a steel ruled ruler and cut the strips following tick marks I made with pencil. The large rosettes were made with 2" wide strips and the small rosettes were made with 1 1/4" wide strips. The next steps is to score the strips at regular intervals. I scored them every 1/4". When the strip is too long for the board, you can make as many score marks as you can and then move the paper over, match up the last score line at a 1/4" and continue until you reach the end. Once scored, fold on the score marks to create an accordian style strip. Then glue the ends of the scored and folded strip together to create a circle.
At this point push the top of the circle toward the countertop with your fingertips. It will collapse insto a circle. I pinch several folds together to keep the rosette's general shape while I apply hot glue in the center.
Then I put a cut circle on top and hold it until it's partially set. Don't wait until the glue is completely set but rather once it's cool enough to hold let go of the pinched folds and the rosette will redistribute the folds evenly. Hold it in place until the glue fully sets. This will be the back of the rosette. Flip it over and apply more hot glue in the center and apply the second circle on top, making sure it's centered. This will be the front. I used 1" circles on the small rosettes and 2" circles on the large rosettes. I cut the circles with my Cricut machine but you can use punches too.

To decorate them, I die cut a large and small snowflake out of CCS Glitter Card Stock in silver. I really love this card stock. It has a chunky glitter look but it's very flexible and easy to cut with electronic or manual die cutters. I know you're wonder but no, this cardstock doesn't shed glitter even a little bit. Once these were done, I hot glued them on to a 12" doughnut shaped base I cut out of cardboard. I formed a hanger by gluing a 7" length of ribbon to the back of the form. On the front, I arranged and then glued the large rosettes down. Then I glued the small ones on top and inbetween the large rosettes. The overlapping of the two sized fully covered up any exposed cardboard.
To finish the wreath, I made a bow from silver metallic wired ribbon. I glued it to the bottom of the wreath. Here's a close up of the rosettes on the base.
This is a basic wreath. You can make more complex rosettes by stacking different sizes on top of each other. You can create a very different lacy look by punch or cutting a pattern on one side of the strips before scoring them. However, even a basic rosette produces a pretty look.
The finished wreath is approximately 14 1/2" wide. It's hung on my craft room door and I'm enjoying looking at it. Since it's a winter wreath, I can keep this up for several more months. It would be a great gift for someone too. I think it's awesome that we can create things for our homes with just cardstock, cardboard and glue! It's the crafter's Super Power!
Thanks for stopping by. I hope you have a beautiful frozen kind of day!
Janet
Disclosure: This post includes some affiliate links. Purchases you make through affiliate links will pay a small commission that allows me to continue purchasing new items to inspire you. Thank you for your support!


