Spring Rabbit Globe


  Easter is just around the corner. Next to Christmas cards, Easter is the next big card holiday for me. After a long hard winter, spring Easter cards are so much fun to make. They're hopeful and cheerful. It always makes me feel lighter when I make Easter and spring cards.

I made this card using an .svg pattern from Cricut Design Space. The image is called Happy Easter #M1479296E. This image is already a great card front but it is made even more awesome with brads and pearl bling from the store. It's so quick and easy to make a card go from good to great with help from Eyelet Outlet.

SHOPPING LIST:

Thanks for stopping by today. If you are thinking about making your Easter cards this year, be sure to stop by Eyelet Outlet to pick up all your card making accessories and bling!

Happy Creating Everyone!

Janet YouTube - Blog - Facebook - Instagram - Pinterest

Caution! Game Night Might Be Fun

Hi everyone! It's Janet here today with a little game night fun. This features Eyelet Outlet's Caution Tape Washi and several brad sets with a game/movie theme. I don't know. This card just might get my teenager to stick around on Saturday night and show us his moves!

Art Impressions Gotta Garden | Double Z Fancy Fold Tutorial


Hi everyone! I'm here today with a fun fancy fold. It's called a Double Z Fold. I had fun making this especially since I haven't done a fancy fold in a while. As with most card folds, this one has a lot of flexibility and looks depending on the patterns, colors and embellishments used.

Sending Smiles


Hi everyone! It's Janet here with a bright and colorful card. This one has a background of washi tape in many styles and colors. Check out the shopping list for your favorite patterns. I decided to heat emboss a white diamond pattern over the entire panel and to my delight, it worked very well. I will say the panel initially warped from the heat but I applied an adhesive sheet behind the panel and attached to another piece of cardstock. This controlled the warping perfectly. 

On top of this card, I added a fun die cut and strip sentiment. I couldn't help but add a unicorn and rainbow from the Unicorn & Rainbow Brads.


Thanks much for stopping by. Please stop by the Eyelet Outlet Store and check out the amazing inventory of washi tapes.

Happy Creating Everyone!

Janet YouTube - Blog - Facebook - Instagram - Pinterest

A Koala-tea Good Time


Hi everyone1 Today I have a trio of Koalas from 5349 Koalas Set. I used a swirled background stamp from Hero Arts called Circle Pattern Bold Print It's the perfect casual backdrop for the adorable koalas in this set. 

In the first card, I colored two of the koala images and used the included dies to cut them out. I cut out the stamped and inked panel with the largest Ai Rounded Rectangle Double Stitched Die. Then I used a cover plate die from Lawn Fawn called Polka Heart Backdrop to cut out the tiny hearts. Behind the panel, I placed blue cardstock creating a confetti of blue hearts in the background. Then I arranged the two koalas and several hearts as well as the two sentiments on the panel. The finished piece was then glued on the card base. 


My second card uses one of the two large koala images from the set. This is a perfect image for anyone who is a tea or coffee lover. What a fun way to wish someone a happy birthday! The confetti that I used on the sentiment is also included in the stamp set. 

Thanks for stopping by today. I hope you enjoyed this little trip into some Koala-tea time! See you next time!

Happy Creating!

Janet YouTube - Blog - Facebook - Instagram - Pinterest 

Seas The Day!

Hey everyone! It's Janet posting this week for the Oceans of Fun challenge going on at the Art Impressions blog. The challenge is all about water.

Always Be Happy!


It always seems to me that cats are happy creatures. They can act up sometimes but mostly they seem pretty happy with their lives. When I saw the cat sticker sentiment and the always be happy strip sentiment, it seemed to me they fit together nicely.

Some Bunny Loves You


Good morning everyone! I'm here today to show off my first spring/Easter card of 2022! Valentine's Day marks the beginning of the spring season and I am totally ready for it. How about you?

This card features a cute little spring bunny image. What makes this card special are the fun brads and washi tapes from the store. It's so easy and fast to create a scene using washi tapes. The egg and polka dot stripes are washi tapes. The grass the bunny is tucked into is also washi.  I've used a Chick brad, Butterfly Brads-Bright and the Sun and Cloud brad set in the scene. Finally I added a Pink Enamel Dot and two pink Heart Shaped Enamel Hearts to finish this scene.

The cute little bunny is from the Art Impressions set 4886K - Easter Blessings. Digital Paper is from CuteNCraftyMommy on Etsy. SALE ALERT! Get 30% off your order at CuteNCraftyMommy using code SUNCRAFTTALK30!

SHOPPING LIST:

Thanks for stopping by today. As you're thinking about your spring card making, take a tour through all the spring related washi tapes, brads and other embellishments at Eyelet Outlet. You're sure to feel the warm sun on your face while you are planning all your spring projects! 

Happy Creating Everyone!

Janet YouTube - Blog - Facebook - Instagram - Pinterest

Loveable Little Critters


Hello and happy Valentine weekend! Today I'm celebrating by showing off two of the four adorable animals in the Loveable Animals set from Art Impressions. I usually prefer to use Copic markers for coloring but this time I decided to pull out my pencils and give it a whirl. One of the fun features of this set is that there are several items that you can color and put in the hands of the critters. I decided to give the fox a heart. The dies are all included in this set including the heart. I used my white Gelly Roll pen to draw stitch marks and the XOXO letters. I gave the cat a flower to hold.


These cards are small measuring 4 1/4" x 3" when folded. For the background of each I cut a 4" x 4" heart in half. I heat embossed the sentiments form the set using black embossing powder. 


To create the backgrounds, I put stacked two washi tapes together and placed them horizontally about an inch from the bottom. I glued half a heart on each one and then placed the animals using foam tape. I finished decorating the cards by gluing small red glitter hearts above the washi tape. I used the heart die again to cut one pink glitter heart for each card. Just like that, I had two cute little cards for Valentine's Day!

Thanks for stopping by today. I hope you have a lovely Valentine's Day on Monday!

Happy Creating!

Janet YouTube - Blog - Facebook - Instagram - Pinterest 

Live Love Woof!


It's Janet here with a friendship card celebrating man's best friend. This card was made with several fun products from the Eyelet Outlet Store

This is a gatefold card, meaning that a flap folds from the left side and the right so that they meet in the middle of the card front. I made a matching panel to put on top. Only the left side is glued to the left flap so that it opens with ease.

Once the card base was constructed, I placed a border of Dog Washi Tape across the top and the bottom of the flaps. Before I glued the center patterned cardstock on to the brown mat, I applied the Live and Woof stickers. I cut the O out of the Love sticker and used a Paw brad instead. I added the dog house from the Kennel Mix brad set and the tallest of the dogs from the Puppy brad set. The cool thing about this set is that it matches the dog washi tape so well! The final touch was Gold Glitter Enamel Dots.

Once completed, I glued the center panel on the brown mat. This way the back side with the brad's prongs are covered with cardstock. Then I glued the left side of the finished center panel to the left flap. This is a quick way to utilize stickers to make a quick but cute card. I picked up the sticker set at the Dollar Tree so it was inexpensive as well as perfect for this card.  

SHOPPING LIST:

Thanks for stopping by today. Check out the Eyelet Outlet Store for all their dog and cat themed brads. There are many more than I used today and there's sure to be something you can't live without!

Happy Creating Everyone!

Janet YouTube - Blog - Facebook - Instagram - Pinterest

CutCardStock My Sweet Valentine Hop - Quill You Be My Valentine with Art Impressions


Welcome to the CutCardStock Valentine Hop! Today our talented team will be presenting an inspiring selection of valentine/love/friendship themed cards, scrapbook layouts, mini albums, flowers & valentines, decorations, party supplies and more. All will feature the wide variety of budget friendly CutCardStock cardstocks and papers.

To earn an entry in a drawing for a $40 gift card from CutCardStock, visit each of the designers blog and the CutCardStock blog and leave a comment at each stop. You can also upload your project at the CutCardStock blog. It's that easy! The winner will be randomly selected via number generator and announced on Monday, Feb 7th on the CutCardstock Blog and Facebook page.

Go to the next designer show next below. For your convenience I've included all the links in order so it's easy to visit each designer.

Hop List
• Judy VZ
• Maureen
• Leslie
• Teri
• Niki
• CutCardstock – link up your project for 2 more entries (up to two uploads)! 

While you are here, please also take a moment to subscribe to my blog. I share lots of inspiration every week! Sometimes I also include video tutorials for those of you who prefer to see how projects are made.

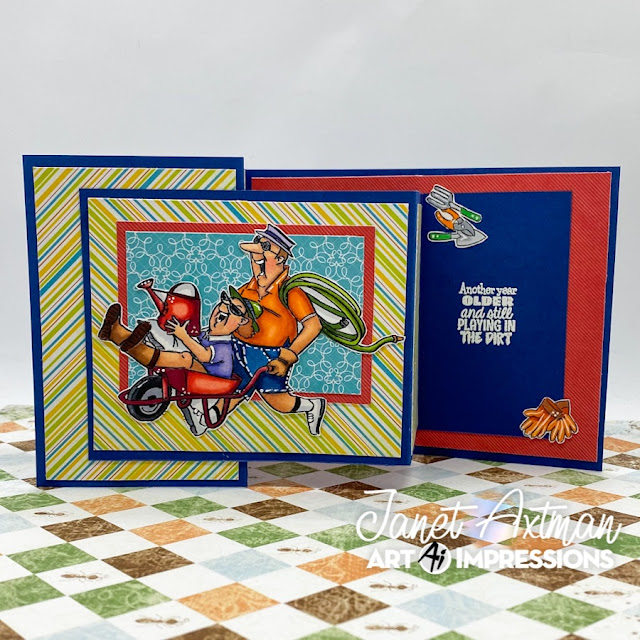
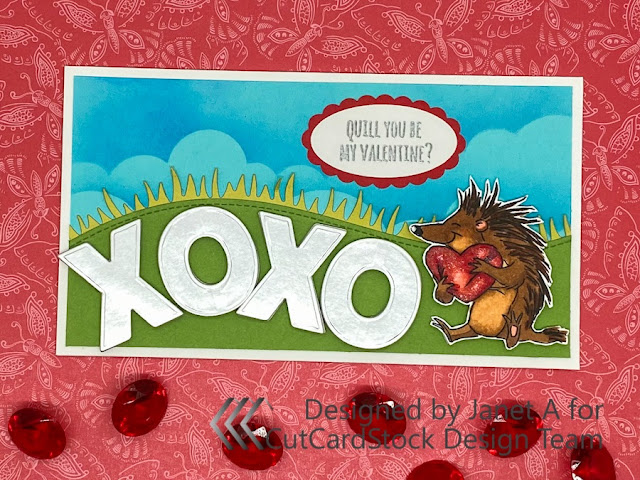
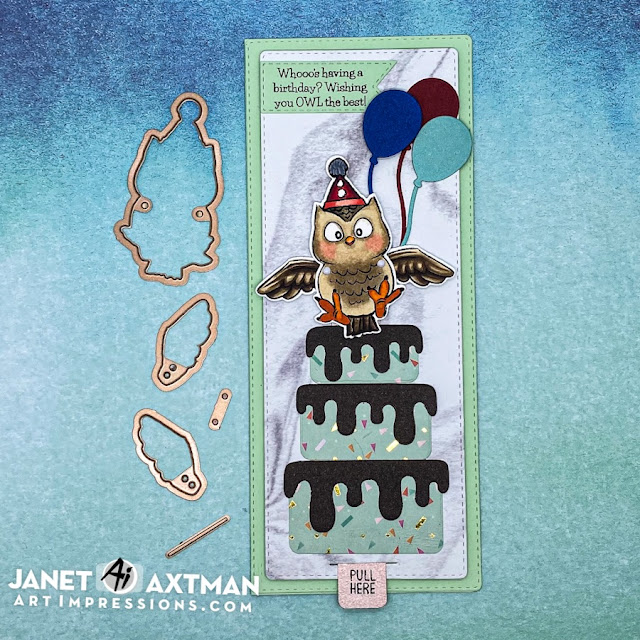
I really love the mini-slimline card size. Mine is 6 1/4" x 3 1/2" when folded shut. I made the card base out of Basis White cardstock. This is my go-to choice lately for bases because it's 80# and is nice and sturdy even when you put a lot of weight on the card front. All Basis cardstocks are 80# so with the wide range of colors available, I can make a base that will go with any color scheme.

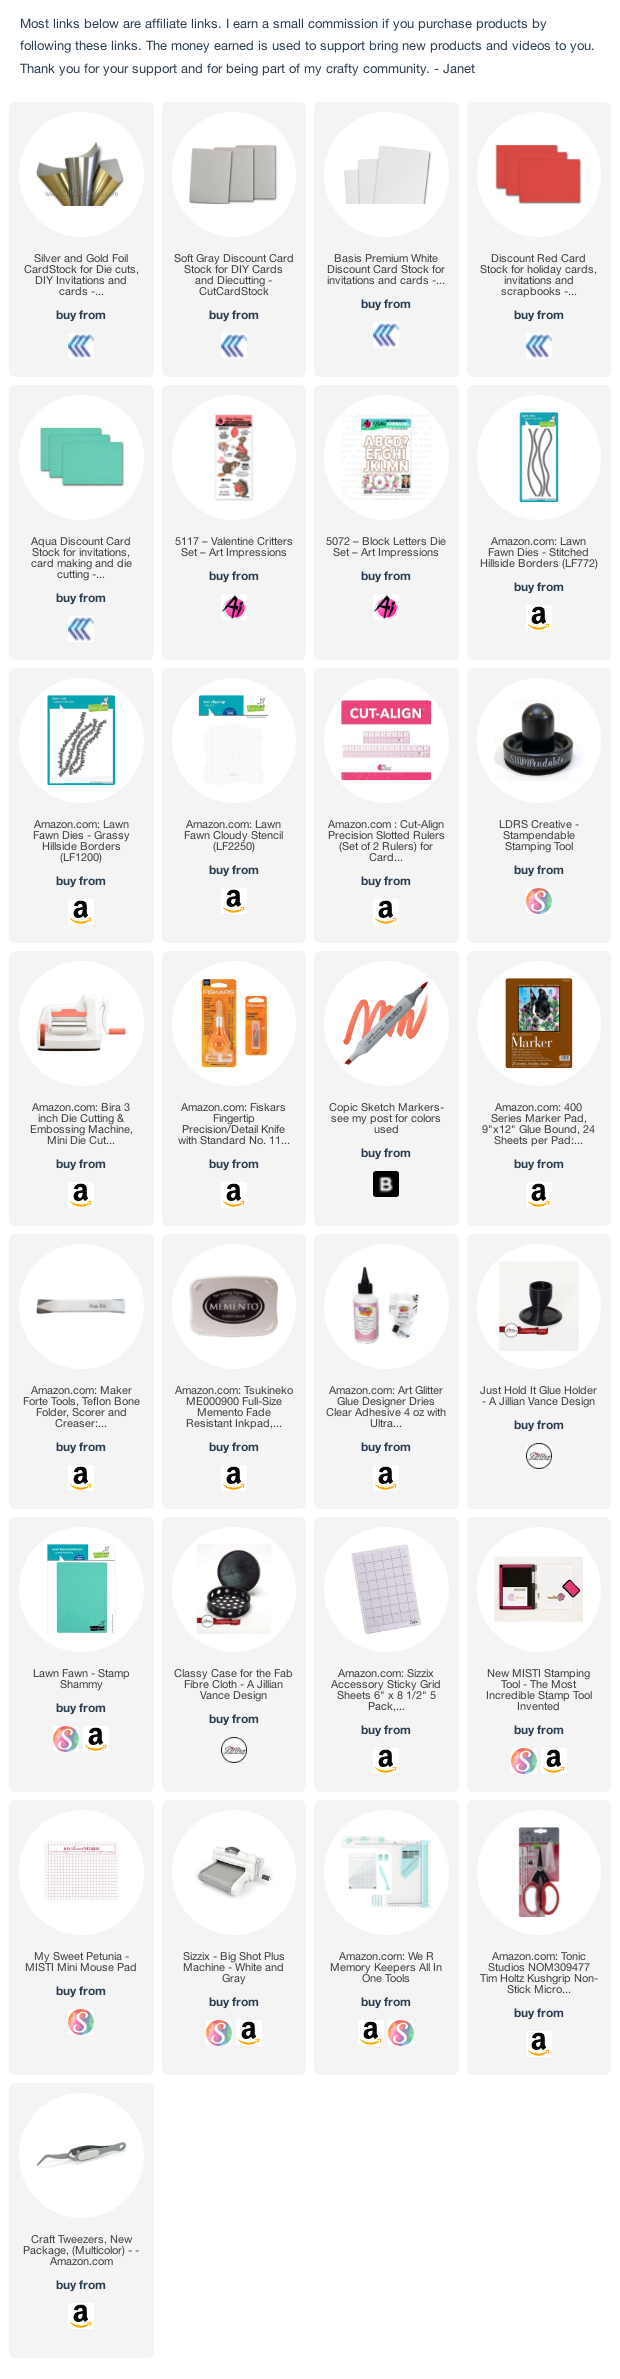
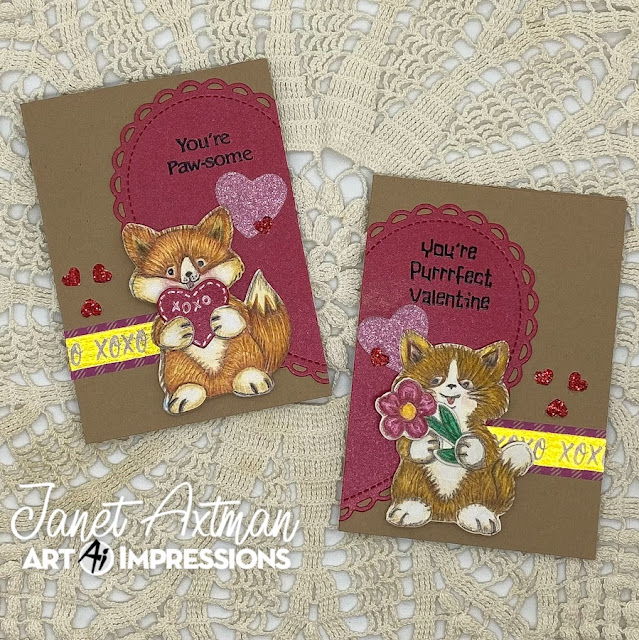
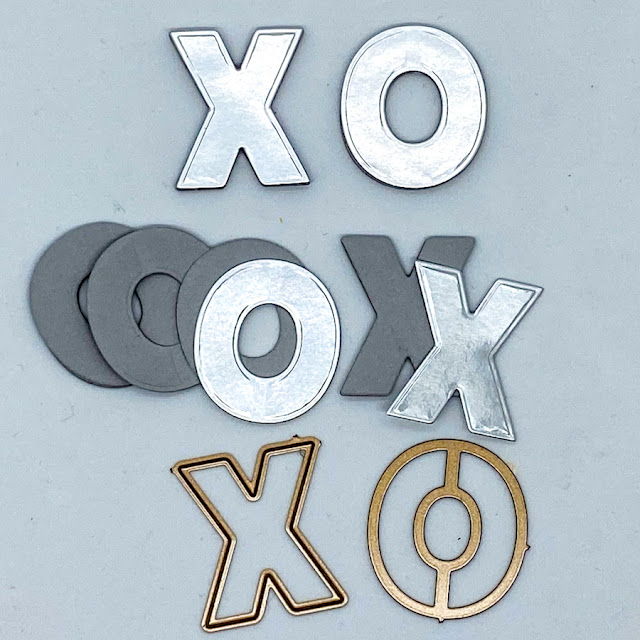
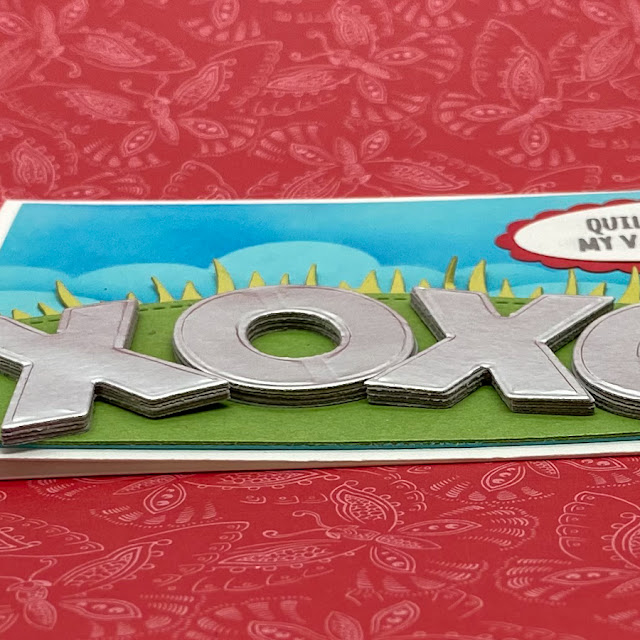
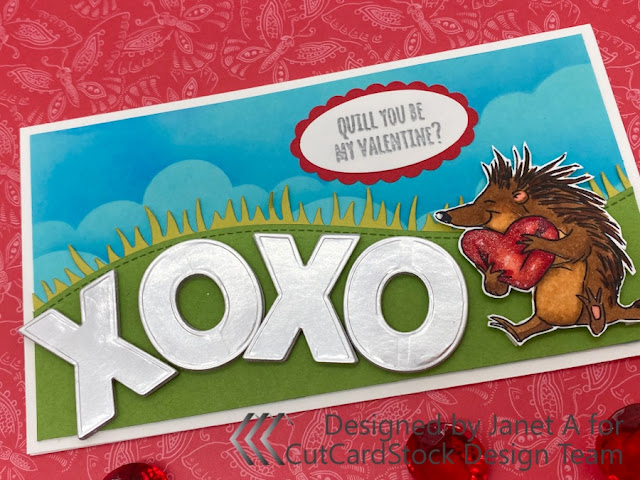
The chunky XO phrase was cut using the Art Impressions 5072-Block Letters Die Set. I cut 6 layers for each letter in CCS Discount Dolphin Gray. I cut one layer in CCS Silver Bright Foil Cardstock. The layers are glued together to form chipboard depth letters.

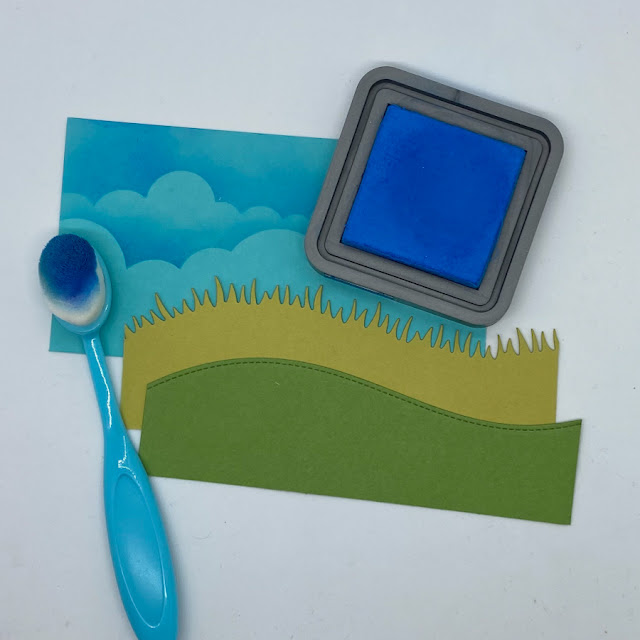
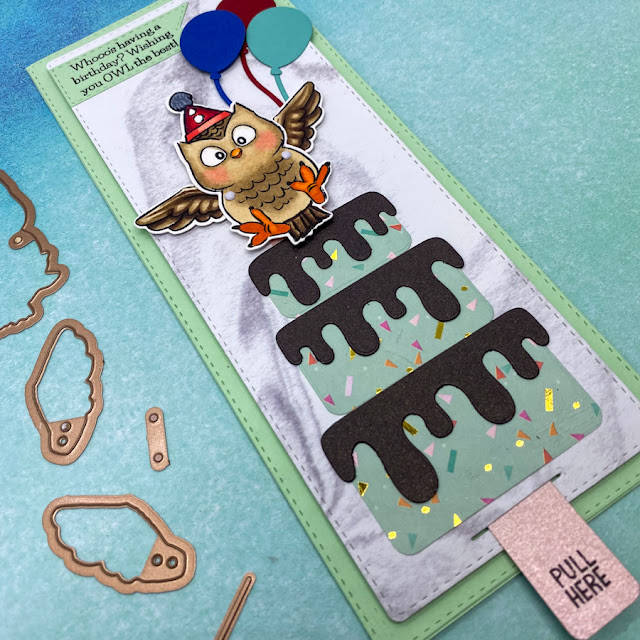
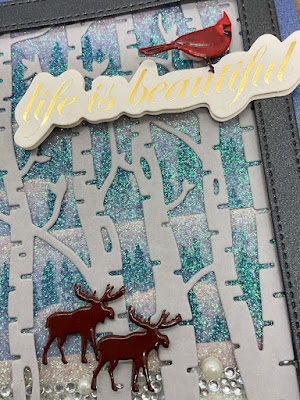
I then went to work on the card scene. I cut a 6" x 3 1/4" rectangle out of Pop Tone Blue Raspberry cardstock Salty Ocean Oxide ink was used in combination with the Lawn Fawn Cloudy stencil to create the sky background. On top of that I made two layers of grass. the spikey grass was cut out of Basis Golden Green with the Lawn Fawn Grassy Hillside Borders Dies. The hill was cut from Pop Tone Gumdrop Green with the Lawn Fawn Stitched Hillside Borders. These two border sets work together well since the shape of the two sets match each other. This is how I was able to get a spikey grass border to match perfectly with the hillside.

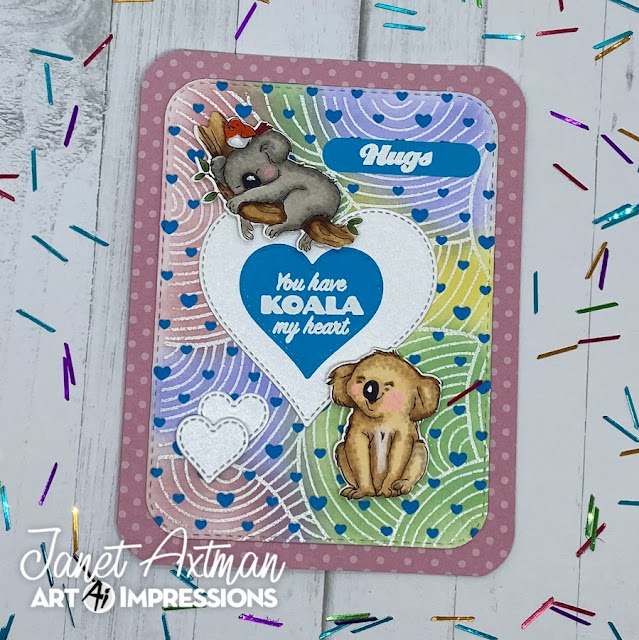
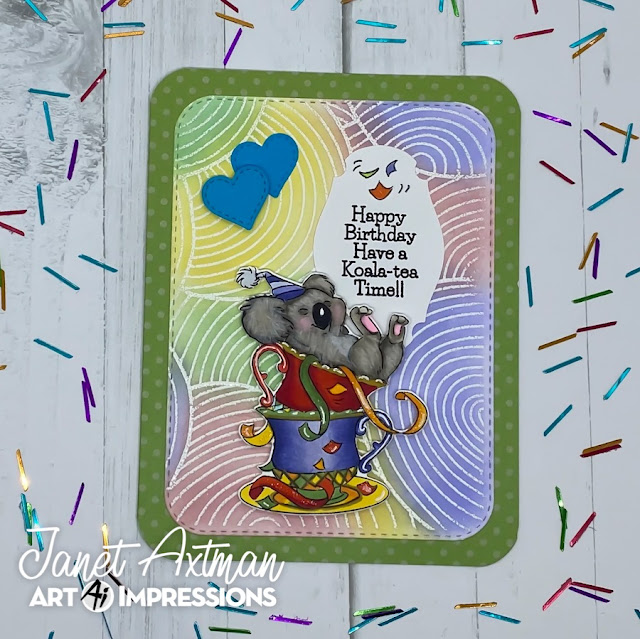
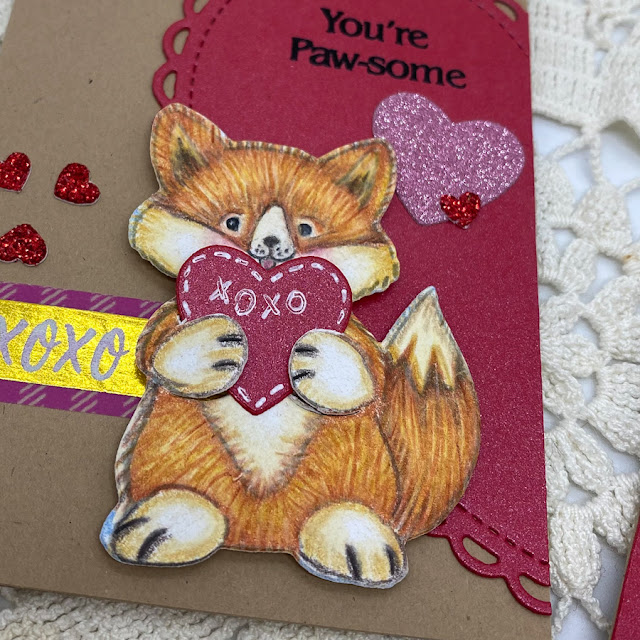
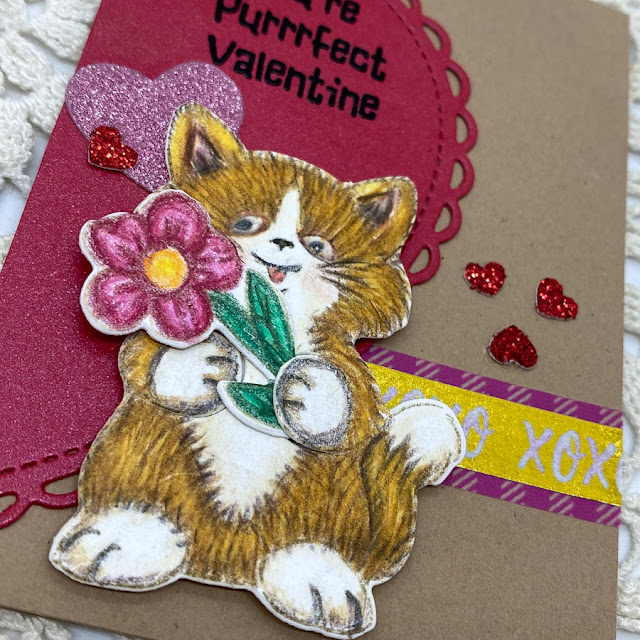
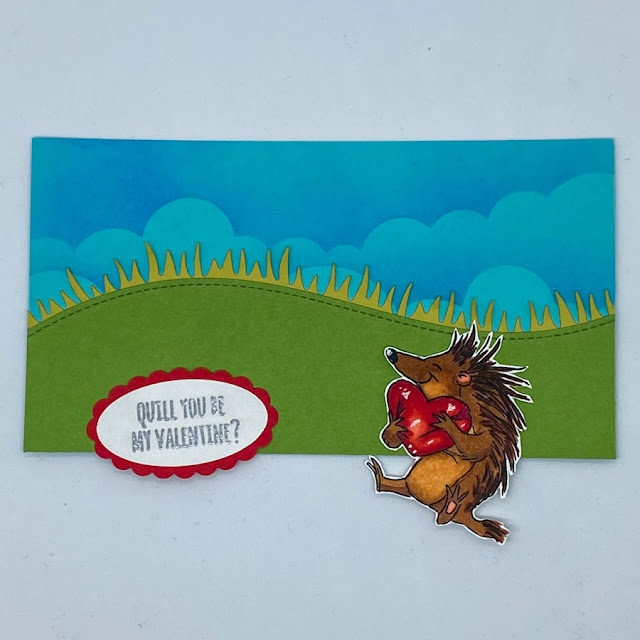
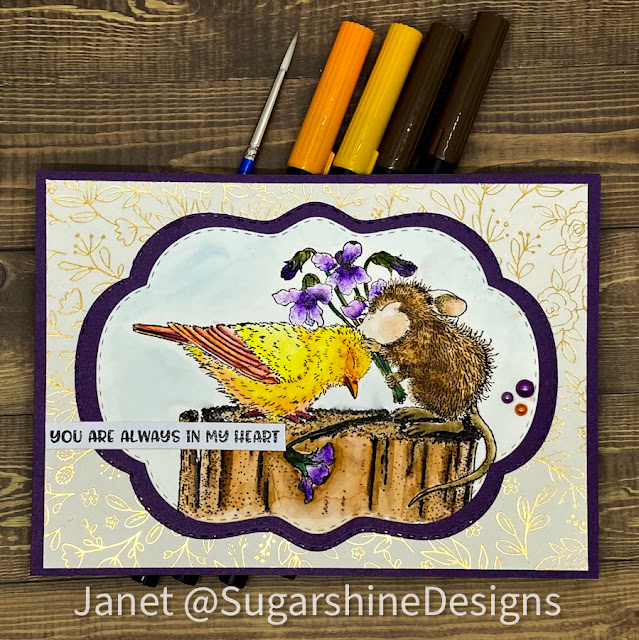
After the pieces were cut, I arranged them on the Blue Raspberry panel. Then I stamped, colored and fussy cut the Porcupine image from 5117-Valentine Critters set from Art Impressions. Isn't he just adorable!

Copic Marker Colors Used:
E29, E25, E23, E21
R39, R29, R24, R20


I heat embossed the sentiment in silver from the stamp set and cut it with a punch. I used another punch to make the scalloped red mat from Pop Tone Red Hot cardstock. I glued them together and placed it on the card front. Below you can see how chunky the letters are. I love the dimension of these chunky letters!


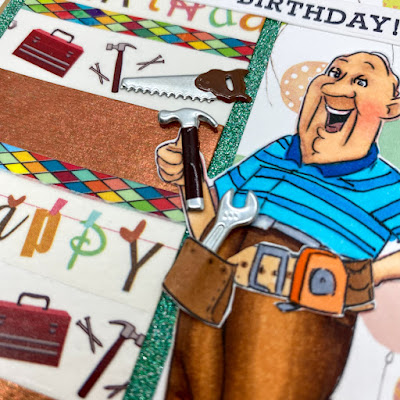
The finished card is super cute and perfect for someone of any age who likes a little punny humor. It is especially suited as a masculine card because it's cute but not feminine. There is no frilly features or pink used in this card.


Thanks so much for stopping by for this hop. Make sure you follow the links to all the other designers and that you leave a comment for everyone. 

Happy Creating!
Janet YouTube - Blog - Facebook - Instagram - Pinterest 

Mouse & Cat Valentine with a Twist


Hello crafty friends! Today I am on the Art Impressions blog with a fun card for the We Love Hearts Challenge. This challenge is all about hearts. It's made from the Twisters Line and this cutie is 5214 - Heart Twist Set. 

Owl the Best Wishes on Your Birthday!


Hi crafty friends! Today I have a slimline card that combines several unrelated Ai sets to create a fun interactive birthday card. This card was made with the 5463-Slimline Dies Set, 5407-Birthday Cake Gift Card Holder Set, 4972-Owl Flutter Set and 5133-Flag Double Stitched Dies.  

The card base measures 8 1/2" by 3 1/2" when folded. On top of the base, I placed a matching cardstock piece cut with a Slimline Die. The next sized die in the set was used to cut the gray marbled mat. I placed the three layers of cake from the Birthday Cake GCH on the gray mat and then stamped, colored and cut out the adorable little owl from the Owl Flutter set on marker paper. I also cut a long pull tab out of rose gold metallic cardstock. I followed the easy Flutter Owl package directions to assemble the winged mechanism and tab and install it under the gray mat. Once done, I glued the gray base on top of the green matt being careful not to glue on or too closely around areas that move. Then I trimmed the tab to the right length and stamped it with a Pull Here stamp from my stash. 

The finishing touches were to stamp the sentiment from the Owl Flutter Set and cut it out with a flag from the Flag Double Stitched Dies set. I also cut three balloons with dies from my stash and arranged all the extra pieces on the card. 

Once complete, pulling and pushing the tab causes the owl's wings to move up and down. I really like how this looks like the owl is landing on top of the cake to wish the birthday recipient. "owl the best!"

Thanks for stopping by today. Please join in on the Ai card challenge. You might win some swag of your choice and challenge yourself with a new technique. Win, win! Click on the graphic above to link up your card.


Happy Creating!
Janet YouTube - Blog - Facebook - Instagram - Pinterest 

Surprise Pop Up Birthday Gift Card Holder

 There are times we just don't have the time or ability to buy someone a physical gift. So how do you make something special to let them know you didn't hit the easy button when giving a gift card? Well, wouldn't you know I have a solution for you!

I made this surprise pop-up birthday cake drawer using Basis, Curious Metallic and Stardream Metallic cardstocks from CutCardStock. The cake and balloons pop out so boldly, you almost expect it to yell, "Surprise!" The file is from Lori Whitlock and can be found here: Happy Birthday Pop Up Drawer Box. I used my Cameo 4 to cut this but you can use any cutter that can handle an .svg file format.

When shut, this box is attractive but unassuming. No one will suspect such a fun pop up feature is inside when opened.

As the drawer is slid open, the pop-up elements all stand to attention. Nothing boring here! Behind the cake and balloons there is an open space perfectly sized to tuck in a gift card.

I cut the sleeve and the drawer out of Basis White cardstock. The 80# weight is absolutely perfect to hold the shape needed for this project. I used Basis Dark Purple cardstock for the sentiment and box trim. Behind the sentiment is a mat of Curious Metallic White Silver. The cake is trimmed with Basis Lt. Yellow cardstock. The candles are made from stacking trimmed Stardream Metallic Jupiter cardstock candles on top of a Basis Lt. Yellow candles. This is the easiest way to get a yellow flame and a red candle. Even those the candles are little, it's not hard to do this.

Inside the drawer there is an accordion folded piece that creates three peaks. It's glued in the drawer and the cake and balloons are mounted inside with recycled clear plastic packaging. All the balloons inside and out are made with Curious Metallic Iceberg, Stardream Metallic Lagoon and Rose Quartz.


To insert the drawer into the sleeve, just push back the embellishments to lay flat and guide the drawer into the sleeve. The pressure of the embellishment being held back is released when the drawer is open and decorations pop out.

I have made a tutorial video to show you how to put it all together. Please check it out by clicking on the video thumbnail below.


So there you have it! It's the perfect way to tell someone you care with an interactive, unexpected surprise gift card box. I hope I've inspired you to give it a try using cardstocks from CutCardStock. It won't disappoint!

Happy Creating!
Janet YouTube - Blog - Facebook - Instagram - Pinterest 

Happy Birthday Tool Man!


Hello crafty friends! Today I'm here with a fun masculine card featuring Eyelet Outlet brads and washi tape. I've used many different washi tapes on this card. It all works together to create a happy birthday tool man theme.

I've also added tool brads to this card. I think the wrench and hammer is perfect for this man. These are from the Tools brad set. The hand saw is from the Saw brad set. Green, orange and white pearls add just a little bit of bling. This may be a man's card but I still think the pearls add the right touch.

This card is for my husband who it a real tool man. I think he's going to get a kick out of it. I just love that no matter the theme, EO always has just the right washi tape and brads. 


Thanks for stopping by today. I hope I inspired you to do a little winter cardmaking. Have a great week!

Happy Creating Everyone!
            Janet YouTube - Blog - Facebook - Instagram - Pinterest  

Cute Farm Animal Valentines for Kids


Happy Saturday everyone! Like a lot of crafters, I've been working on Valentine cards and today I'm bringing you some cute children's valentines made with the 6 freebie stamps that were released with the second 2021 new releases from Art Impressions.

I stamped these cuties and colored them with Copic markers. Then they were fussy cut and arranged on hearts that form an off the edge valentine. The white cards and the patterned card base were cut with the Rectangle A2 Double Stitched Dies. These fit into A2 envelopes and have blank white cardstock on the back where any message can be written. 

I think grade school kids would love these for their friends. I get a chuckle out of the punny sentiments that go with each animal. I made the sentiment cards using Microsoft Word.

I know a lot of you have some or all of the freebies. I have made a video that shows how I made these. If you are curious what colors I used and see how I colored each of them, click the thumbnail.


Thanks for stopping by today. Ai has many adorable stamps to use and I hope you are having fun making your valentines!

Happy Creating!

Janet YouTube - Blog - Facebook - Instagram - Pinterest

Winter Beauty


So how's the weather been treating you? A lot of the country has had some rough weather lately and here in Charlotte we actually had snow! Woohoo! We don't get snow too often and we got some last Sunday and again Friday night. It doesn't last long here which is just how I like it. It's pretty when it comes and just as nice when it goes. 

All the cold temps and the snow inspired my card today. There are many products that can be used for a winter theme. The background of the forest is made with Glitter Winter Washi Tape. I love the subtle pattern of trees in the tape. I used two rows of Sparkle White Glitter Tape to represent the snow. Two strips of Fancy Long Bling-Pearls & Jewels in clear adds a bit more sparkle. I used a pair of Moose Brads in the scene. The Cardinal Brad is the perfect pop of color in this neutral scene. 


Thanks for stopping by today. I hope I inspired you to do a little winter cardmaking. Have a great week!

Happy Creating Everyone!


                                     Janet YouTube - Blog - Facebook - Instagram - Pinterest  

Cool As a Cumber Workout Gal


Happy Saturday everyone! Today is day 3 of the Shimmy and Shake Challenge over at the Art Impressions Blog. This challenge is right up my alley. I love making interactive cards. Today I used a Wheelie set 5095 - Workout Gal. Isn't she as cool as a cumber? I love that she's drinking wine instead of water and that she's all glammed up instead of sweated up. Wish all of us could look that good when we're getting in shape!

Perfect Card for a Boy - Hamster Wheel Cubbie Card


Hello everyone! Today I'm rolling with the Art Impressions current challenge, Get In Shape. This has been a great stretch challenge for me since my normal go-to card shape is an A2 and sometimes a 5 x 7 card. I was looking at my collection with fresh eyes and realized that the Cubbie line all include the most fun stamped shapes. Why not make a shaped card base to fit the fun cubbie stamp image? The result is an adorable little card with a ton of personality. Plus, we all know how hard masculine cards can be and this one would be right up a boy's alley! What a fun card to give to a child or friend who needs a little encouragement or has recently done something great. 

Happy Birthday Weenie!


January is an important time at my house because it's my husband's birthday month. It's a tradition that his birthday card has a doxie dog on it. It began decades ago when our fur baby was a doxie. Our beloved Tigger has been gone a long time but he is always remember during Steve's birthday. Funny how traditions begin but that's the story behind ours.

I saw this ephemera piece in a paper pad I have in my stash and of course my head danced with all kinds of way to make this really special using Eyelet Outlet brads, washi tapes and bling. I love it and I think my husband will too! It's so easy to take something good and make it great with EO embellishments.

SHOPPING LIST:

Thanks for stopping by today. Have a great week!

Happy Creating Everyone!


                                     Janet YouTube - Blog - Facebook - Instagram - Pinterest  

Why Can't I Be Queen?


Today I'm sharing another card for the Get In Shape Challenge at the Art Impressions blog. Last weekend, I posted a towel shaped card made with AiCS31 - Pamper Yourself. This weekend, I'm sharing the card I made with the other main image in this set. I also used the Ai 5063 - Rectangle Double Stitched Dies and the 5133 - Flag Double Stitched Dies for this card. Here our lady is prepared to receive her massage. What I love about her is that she knows her self worth and ponders just why it's asking too much to be treated like the queen she is!
  
The crown-shaped card base was created by enlarging an image in Cricut Design Space. The front includes all the pieces in purple, gold and mirror cardstock. Pearl and gem bling was used to decorate it. The back is a solid version of the shape. I connected the two together by scoring a horizontal line about 3/4 down from the top of the solid shape. The two pieces are glued above the score line creating a hinge for the card. You can turn any shape into a card using this method. 

I really enjoyed coloring this lady with Copic markers. I added additional fold details to the towel and light shading. A little white gel pen was used for highlights n her arm, mask and earing.

COPIC COLORS USED:
C00, C0, C1, C3, C5
BV04, BV02, BV00
YR14, YR 15, YR 18
E000, E00, E04, E11, E21, R20

Thanks so much for joining me here today. Don't forget that our current Art Impressions challenge Get in Shape is running through Wednesday of next week. A new challenge will be up on Thursday. Submit your shaped cards (no rectangles or squares) for a chance to win Ai stamps of your choice. Click on the image below to be taken to the challenge post and link up your creation.


Happy Creating!

Janet YouTube - Blog - Facebook - Instagram - Pinterest

House Mouse Birdie Kiss


Hello and happy Friday everyone! Today I'm doing a very quick card share of an adorable House Mouse Designs stamp called Birdie Kiss. I have been practicing water coloring using Tombow Dual Tip Markers. Earlier this week, I was rummaging through my stamps and came across this one. I had picked it up at Tuesday Morning in 2018 and had never used it. Well, one look and I fell in love with it again and this time I pulled it out to stamp and paint. Finally! Unfortunately, I think this stamp is discontinued but you might be able to find it on Ebay or Etsy if you really want this stamp.

I paint this by using a pallette, rubbing marker ink on to the palette and then picking it up with a damp #3 round brush. I apply the color directly from there but there are times I wet the area I'm coloring first if I want it to spread out and give more variation of color. Every time I paint something, I learn something and this was no exception. I'm far from perfect but practicing is making me more comfortable and giving me more confidence to try the next one.  

This is a 5 x 7 card. Usually I make 4 1/4 x 5 1/2 cards (A2 size) but this is such a nice large stamp, I thought it deserved a bit more real estate. I used a 5 x 7 sized Curious Metallic Violette cardstock for the background. I cut the purple mat out of the center of the 5 x 7 piece, then placed the gold metallic patterned paper from my scraps on top to cover the hole created by cutting the mat. Then I put the mat and the cut image on top of that. I glued the finished panel on a cream 5 x 7 #110 Classic Crest Natural cardstock card base. This way, I only used one sheet of 5 x 7 specialty paper and not that much was wasted.

I'm entering this card into the House-Mouse & Friends Anything Goes Monday Challenge

I'll be back again tomorrow with my regular Art Impressions project. Take care everyone!

Thanks for stopping by today. Have a great week!

Happy Creating!

Janet YouTube - Blog - Facebook - Instagram - Pinterest


So Irresistible!


Unfortunately, I’m making a lot of get well cards lately. I decided to make lemons into lemonade by coloring up several of these cheerful cards. As they say, humor is the best medicine! I know these cards will brighten people's day when they’re received. 

This is made with the Art Impressions 4863 Irresistible Set. I really love her bed. It’s just like the antique brass bed I had when I lived at home so many years ago. I think I would have picked this one up just because of that but it also makes up some great cards with just the right amount of light heartedness.

This is an A2 card that folds at the top. I used XXX in Basis cardstock. Basis is an 80# weight and I highly recommend it for it's solid core, smooth surface and beautiful colors. It's outstanding used as card bases but it also cuts wonderfully in both metal dies and on electronic cutting machines. The beautiful pink cardstock is Pink Quartz Stardream Metallic cardstock. It is so lustrous and beautiful! You can get both cardstocks at great prices at CutCardStock. If you haven't checked them out yet, you really should.  

The beautiful border on this card is from one of my new favorite rectangle nesting die sets from Spellbinders. This one is called Candlewick Rectangles. It can be run through twice to create embossed details. In this card, I did not take that extra step. I just really love the circle/diamond pattern it creates around the edge. It's really different and adds a lot to a card. 

I stamped this onto marker paper and colored it with Copic colors. I used the package illustration to guide my shading and color choices. I think it’s great that you can always use the package illustration for an example. One thing I changed up though was the bed color. I made mine into a brass bed of course!

COPIC COLORS USED:
0, C1, C3
E00, E21, E23, E25, E09
B00, B01, B04, BV02, V17
RV21, R24, YR02

Thanks so much for joining me here today. Don't forget that Ai's current challenge Get in n Shape is running through Thursday this week. Submit your shaped cards (no rectangles or squares) for a chance to wins Ai stamps of your choice. Click on the image below to be taken to the challenge post.

Thanks for stopping by today. Have a great week!

Happy Creating!

Janet YouTube - Blog - Facebook - Instagram - Pinterest