Welcome to the CutCardStock Valentine Hop! Today our talented team will be presenting an inspiring selection of valentine/love/friendship themed cards, scrapbook layouts, mini albums, flowers & valentines, decorations, party supplies and more. All will feature the wide variety of budget friendly CutCardStock cardstocks and papers.
To earn an entry in a drawing for a $40 gift card from CutCardStock, visit each of the designers blog and the CutCardStock blog and leave a comment at each stop. You can also upload your project at the CutCardStock blog. It's that easy! The winner will be randomly selected via number generator and announced on Monday, Feb 7th on the CutCardstock Blog and Facebook page.
Go to the next designer show next below. For your convenience I've included all the links in order so it's easy to visit each designer.
• Maureen
• Leslie
• Teri
• Niki
• CutCardstock – link up your project for 2 more entries (up to two uploads)!
While you are here, please also take a moment to subscribe to my blog. I share lots of inspiration every week! Sometimes I also include video tutorials for those of you who prefer to see how projects are made.
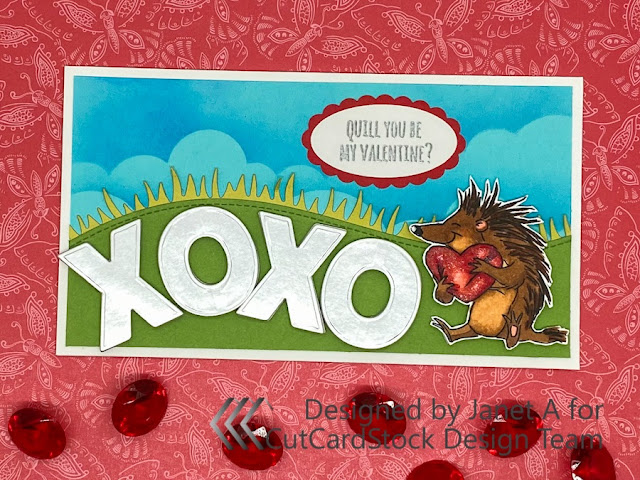
I really love the mini-slimline card size. Mine is 6 1/4" x 3 1/2" when folded shut. I made the card base out of Basis White cardstock. This is my go-to choice lately for bases because it's 80# and is nice and sturdy even when you put a lot of weight on the card front. All Basis cardstocks are 80# so with the wide range of colors available, I can make a base that will go with any color scheme.
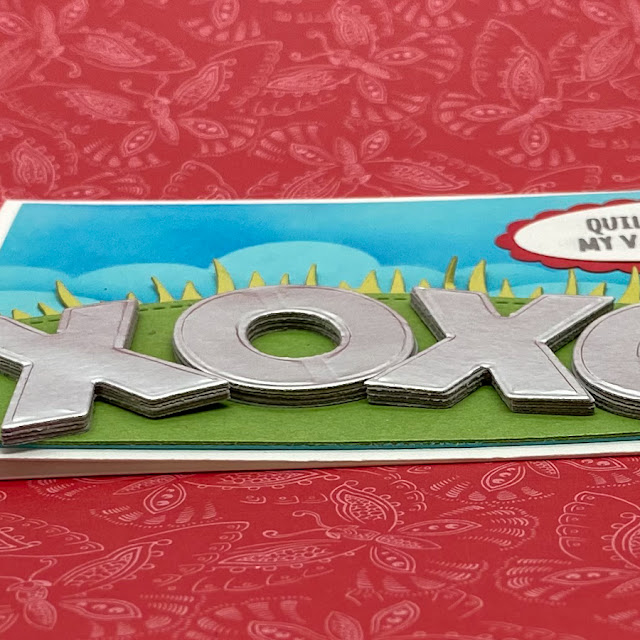
The chunky XO phrase was cut using the Art Impressions 5072-Block Letters Die Set. I cut 6 layers for each letter in CCS Discount Dolphin Gray. I cut one layer in CCS Silver Bright Foil Cardstock. The layers are glued together to form chipboard depth letters.
I then went to work on the card scene. I cut a 6" x 3 1/4" rectangle out of Pop Tone Blue Raspberry cardstock Salty Ocean Oxide ink was used in combination with the Lawn Fawn Cloudy stencil to create the sky background. On top of that I made two layers of grass. the spikey grass was cut out of Basis Golden Green with the Lawn Fawn Grassy Hillside Borders Dies. The hill was cut from Pop Tone Gumdrop Green with the Lawn Fawn Stitched Hillside Borders. These two border sets work together well since the shape of the two sets match each other. This is how I was able to get a spikey grass border to match perfectly with the hillside.
After the pieces were cut, I arranged them on the Blue Raspberry panel. Then I stamped, colored and fussy cut the Porcupine image from 5117-Valentine Critters set from Art Impressions. Isn't he just adorable!
Copic Marker Colors Used:
E29, E25, E23, E21
R39, R29, R24, R20


Such a sweet card!
ReplyDeleteOh the cuteness...love the little hedgie!
ReplyDeleteSuper adorable! I LOVE pun-y sentiments and your little porcupine is beyond cute! Love this!
ReplyDeleteOh my this is so cute and fun Janet!
ReplyDeleteFun Valentine card! I love your pretty coloring and the scene you created! Great pun sentiment to go with the porcupine!
ReplyDeleteGreat layers created. I like the foil cardstock for the letters.
ReplyDeleteSuper cute card. Love the clouds and those grassy borders.
ReplyDeleteAwesome fun card Janet! Great color palette and composition
ReplyDeleteI like the cute scene you created for this porcupine.
ReplyDeleteI love the layerin on the letters! Porcupine love <3
ReplyDeleteI love the bold XOXO. So much fun
ReplyDeleteHugs, Joy