We're the Perfect Blend - Coffee Inspired Card

Happy Sunday everyone! It's Janet and today I'm here showing off Eyelet Outlet's new Iced Coffee Brads. When I saw that there are strawberry and chocolate coffees in this set, I thought of the sentiment I used on this card. It's sweet but not too sappy and could be given to a best friend or a significant other. 

Autumn Window Scene - You Have to See It!

 I am totally in love with the newest Windows To The World sets issued this week by Art Impressions. In case you're not familiar with them, the line features miniature peeks into a scene and always include a separate stamp to use as a 3D element. They come with dies as well. They also always include a hand written message around all sides of the image. Today I'm featuring the new #5449 - Autumn Window Set. I'm a big fall lover and this scene doesn't disappoint!


The Windows To the World sets can be used several ways. They are sized perfectly to coordinate with the new #5408 Shadowbox Window Die set. You can also use them with #4619 Window Die Set or #4760 Garden Window Stamp and Die Set. These dies give a lot of dimension and the feeling that you really are looking through a window.

For this card I decided to keep it very simple. I created a square card base and applied a patterned paper that had pretty orange houses with gold foil accents. Then I cut a window on the front using the Square Double Stitched Die set. Inside the card, I stamped the image so that it appears through the window. Two of the Square Stitched dies to make a frame for the window in the same cardstock as the base. 

Then came the fun part! I colored the two stamps with Copic markers and cut out the basket. I mounted the basket in the scene with double-sided foam tape. A brown bow at the top was all the extra embellishment I thought this card needed.

This window would be a lot of fun to color in so many mediums! Pencils, water color and alcohol markers all work perfectly and they make up super quickly since they are fairly small images. 

I hope you liked seeing this fantastic new set. I highly recommend that you go check out all the newest sets now available at the Ai store!

Happy Creating!
Janet YouTube - Blog - Facebook - Instagram - Pinterest

Copic Markers on Kraft Card Stock - Sending Thanks


I don't know about you but I really love Kraft cardstock! It's so versatile and the soft neutral brown goes with every color and theme. It gives off a little rustic vibe but it can also be used on very sophisticated projects too. I personally like to use it when working with floral and greenery images and today's card is an example of that. You may not think of using Kraft cardstock for Copic coloring but it works nicely and it gives a richness to it.

A Mini Garden Shed - It's a Beauty!


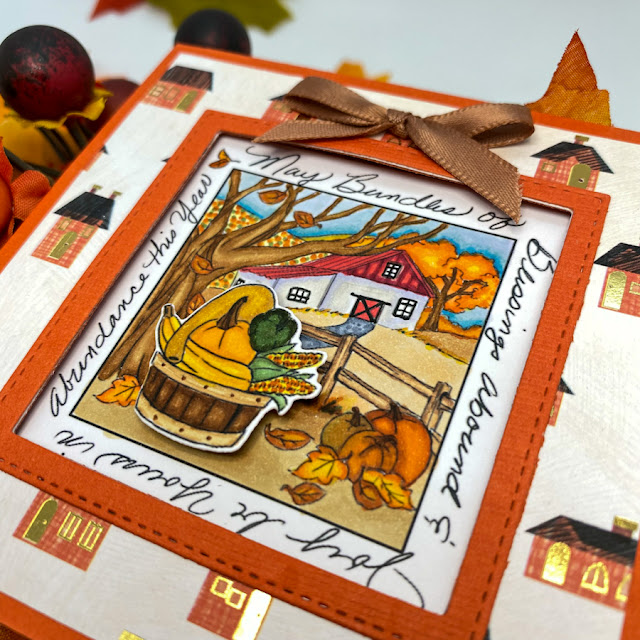
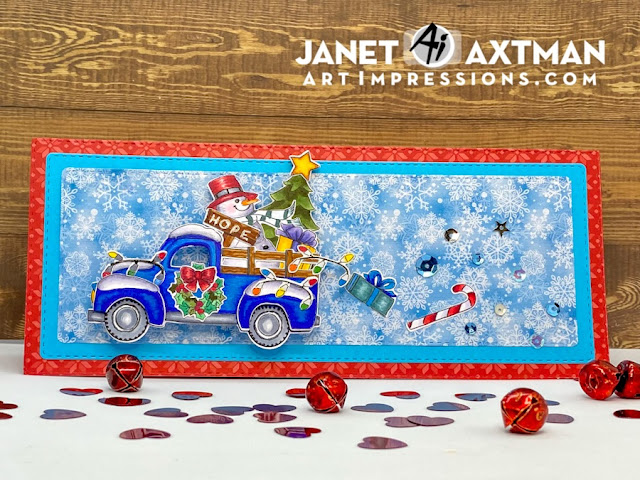
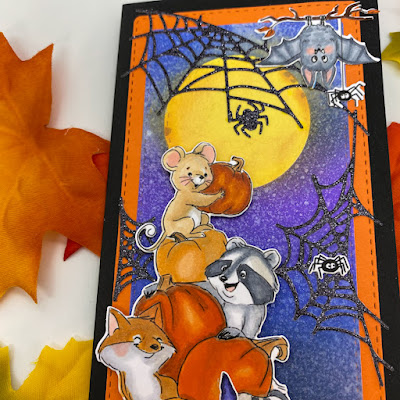
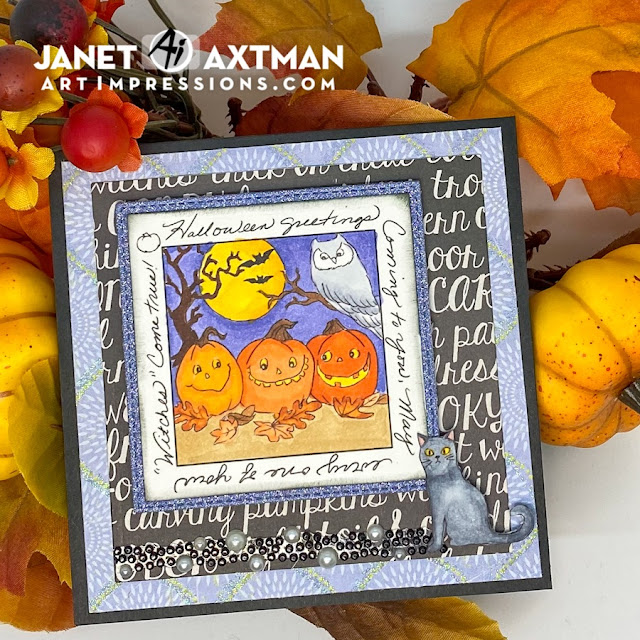
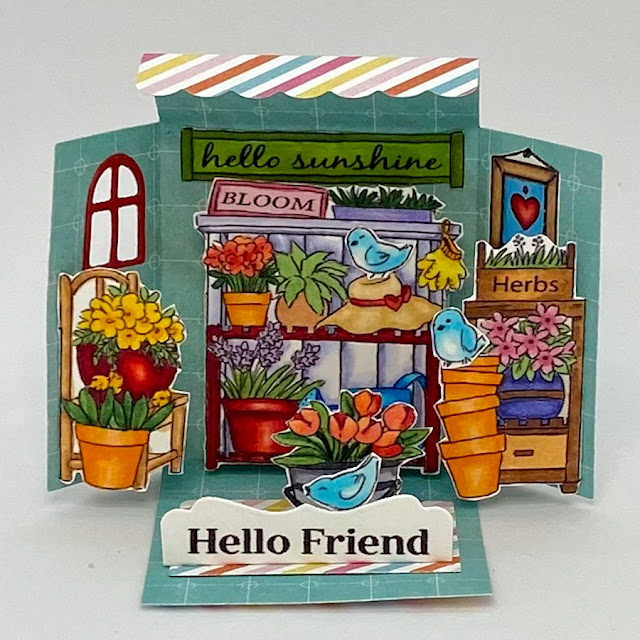
Hello friends!I hope you're weekend is off to a great start. The fabulous new releases continued this week over at Art Impressions with a round of brand new Matchbook cards. They've added a Halloween themed room, two Christmas scenes, an office scene and a garden scene. My card today features #5444 MB - Garden

These enticed me to take a little break from fall and Christmas and explore this fabulous garden shed.  It's a darling little world of flowers and pots you are likely to find in every garden shed throughout the world. The details of blossoms, herbs, garden gloves and even the peek of a watering can make this scene so much fun to create, give and receive!

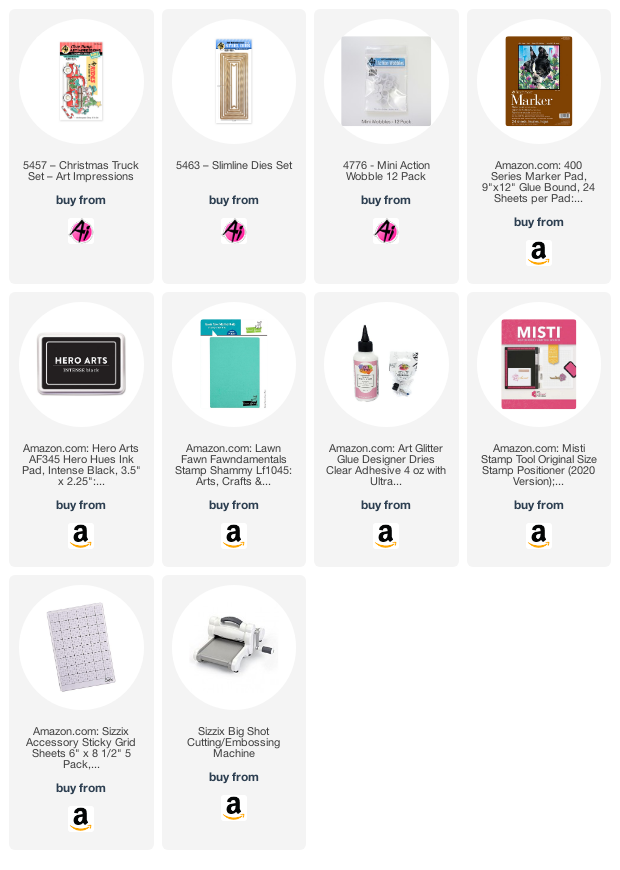
To make this card, I stamped the images on marker friendly card stock. I chose many bright Copic marker colors and a few pastels. I really didn't think about what colors to use but just colored one stamp at a time working in sections. I chose the hues as my mood directed. I find coloring this way is the most relaxing. I just let go of the thinking part of my brain and allow my creative side to pick colors. Before I knew it, the images were all done and ready to cut out and put in the matchbook template (sold separately #5317). The template is the card base that the individual stamped images fit into. 

All the matchbook sets come with dies to match the stamps. I cut them the Flower Shop images, folded the tabs on each stamp and used the tabs to glue them into place in the matchbook base. When done, the stamps fold in so that you can close it up and give it to someone. For your convenience, there is an optional die for a matchbook envelope (#5318). Both the matchbook template and the envelope will work for all the matchbook scenes so you only need to buy them once.

I will mention that the Matchbook Templates are currently out of stock at the Ai Store. I checked several of their resellers and they're out of stock too. Obviously the matchbook cards are selling like hot cakes! If you are wanting to purchase the template, I advise you create an account on the Ai site and use the notification feature. That way you'll be emailed when they are back in stock and you can complete your order. You can also periodically check Simon Says Stamp, Scrapbook.com and Ellen Hutson. At this time they are also sold out but they might stock it sooner so it's good to keep an eye out. The pricing is the same no matter where you purchase them.  

I hope you enjoyed this fresh little matchbook card and will go check out the entire matchbook line. There are a lot of them now and there's definitely something for everyone. Have a wonderful creative weekend everyone! 

Happy Creating!

Janet YouTube - Blog - Facebook - Instagram - Pinterest

Christmas Gnome Cutie!


Hello! It's my turn at the Eyelet Outlet blog. Today I have a cut little gnome for Christmas. He's making Gift Brads deliveries today since we all know it's going to be impossible to order gifts after October this year! Ha ha!

This card features the Glitter Winter Washi Tape as the background. A Holly Brad decorates the sentiment. A cute little green Heart Pastel Shaped Enamel Dot decorates his hat. The gnome and his cart is printable art I purchased from Pink Gem Designs. I fussy cut him before applying with foam tape.

In case you didn't notice, Eyelet Outlet issued four new brad sets this week. In addition to Gift Brads, we added Female Cardinal BradsCupcake Swirl Brads and Iced Coffee Brads. They are awesome additions to add to your stash and will help get your creativity going.

Thanks for stopping by today. 

Happy Creating Everyone!

 Janet YouTube - Blog - Facebook - Instagram - Pinterest 

Christmas Truck - So Cute!


Hello! Have you seen the new Art Impressions Rides Interactive Series just released? So far there are three stamp sets and they are awesome. I especially like that all the images are interchangeable between the three sets. The images can also be used on their own without the cars or trucks to give you maximum versatility. 

Today I'm showing you the card I made using the new Christmas Truck Set and the Slimline Dies Set. There is a lot packed into this one. It includes the truck, separate fenders for the wheel wells, two presents, a tree, a candy cane, wreath, snowman, star, bow, string of lights and sign. I really love that this set comes complete with matching dies. That's a lot packed into one set! 

I invite you to watch the video I made for this card. Find it by clicking on it below.


I chose to create a slimline scene. After arranging goodies into the truck, I put it on an action wobble. It's so fun to make the truck shake. I arranged a package, candy cane and some magic dust (aka sequins!) to the rear of the truck. This makes it appears that along the way, a few things escaped!  

I hope you enjoyed the card I made for you today. I invite you to make a visit to the store to see all the wonderful new stamps sets released so far!

Happy Creating!

Janet YouTube - Blog - Facebook - Instagram - Pinterest


Adorable Cookie Baking Ginger - Cameo 4 Project

Hello everyone! 

I am in the middle of a love affair for gingerbread tags for the holidays. I have been making them since August and I show no signs of stopping! Have you been obsessed by a certain topic or theme before? 

Today I'm sharing my latest Ginger tag or ornament (if desired) made with my Cameo 4 machine. This file is from Kadoodle Bug Design and it's called, Cookie Dough Ginger Boy. The finished tag measures 5 1/2" x 4" so it's pretty substantial.


Hi everyone! It's my day on the Eyelet Outlet blog and I've got a fun, sorta spooky A2 sized Halloween card for you today. The spooky tree is accented with Ghost, Eye, Mini Leaf and Spider brads. I love how the eyes give the tree a real personality! 

The images and sentiment in this card are from the new Diamond Press Peek-A-Boo set. I stamped the tree first on Copic friendly cardstock. Then I colored the tree with a brown blend and used a bright yellow marker for the eyes and mouth. I cut a mask for the tree and put it over the colored image. I did the ink blending with oxide inks and then splattered the panel with water and Dylusians White Linen Spray. The webs are from the new Art Impressions Web Dies Set. 

This was a fun card to make. What Halloween cards are you making this year? Check out the EO store for all your fall and Halloween embellishments!

SHOPPING LIST

Thanks for stopping by today. 

Happy Creating Everyone!

 Janet YouTube - Blog - Facebook - Instagram - Pinterest 

So Cute Critters In a Wagon! Art Impressions New Release

Have you seen the new Halloween releases from Art Impressions yet? Oh my goodness! They are adorable! Today's project uses the new Halloween Slimline Set, the Slimline Dies Set and the Web Dies Set. These little trick or treaters are way too cute to spook!

I am so happy that Ai has added a slimline die set. This has 6 stacked dies. As a bonus, it includes a long flag die too. For today's card, I used the 3rd largest die for the main panel and stacked it on top of an orange panel cut with the 2nd largest die. I love the stitching and it matches all the other stitched die sets from Ai. 

I haven't done a construction video for a while but I have one today! Click on the thumbnail below to see how I created this card.

One of the great things about the new Halloween Slimline Set is that it comes with matching dies for every stamped image except for the skinny Halloween letters. However, I did notice that the flag in the Slimline Dies Set would cut that phrase out perfectly. 

I colored the images with Copic markers and then created a background panel using several Oxide inks in Forest Moss, Black Soot, Chipped Sapphire and Blueprint Sketch. I created the moon by cutting a mask with a die from the Round Double Stitched Die set. The negative of the cut was used like a stencil to fill in the moon with Squeezed Lemonade and Spiced Marmalade. Then the circle itself was used as a mask to protect the moon while I blended the much darker sky around it.

Water and Dylusions Spray in White Linen was used on the inked panel before I arranged all the pieces on it. The critter wagon (as I like to call it) was mounted with double sided foam tape. I cut the webs out of black glitter cardstock and attached them and the other images to the panel with Art Glitter Glue. I have to say that I adore the hanging bat from the set. I think he could carry a card all by himself, he's so cute! He even has tiny little fangs. The last thing I did was stamp the sentiment Trick Or Treat on the bottom of the card using a phrase from the Halloween Critters Set.

Thank you for stopping by today. I hope I've encouraged you to check out all the new releases from the past two weeks at the Ai store. There's more coming so keep your eyes and ears on! You're going to love the new designs. In the meantime, join us in the slimline card challenge going on now through Wednesday next week. You could win up to three sets of your choice!

Happy Creating!

Janet YouTube - Blog - Facebook - Instagram - Pinterest

Nostalgic Fall - Apple Pie and More!


Hi everyone! It's feeling more like fall here all the time and the season always makes me think of the good apple pie that would be served in my hometown restaurant this time of year. The restaurant (and 25 cent pie) is long gone now but the memories remain. 

Today's card for Eyelet Outlet let me bring to life some of those old memories. The paper piecing was done with a file called Apple Darling from KaDoodle Bug Designs. I cut it on my Silhouette Cameo 4 machine. I used a die for the blessings word and cut and glued 4 layers together for some depth. I used chalk to highlight the pie edges and white chalk to make the chalkboard seem a little more chalk-like.

Once the paper piecing was done, I arranged the scene by adding Apple, Coffee and Sunflower Brads from Eyelet Outlet. The brads add nice metal textures and bright colors to any scene made with them.

Thanks for stopping by today. Have a wonderful week!

 Happy Creating!

Janet YouTube - Blog - Facebook - Instagram - Pinterest

Art Impressions New Release - May Your "Witches" Come True!


New releases are starting to come out at Art Impressions. Woohoo! There's so many amazing sets coming out for everyday, fall and winter/holidays. Today I'm showing the first of several new Window to the World sets that will get announced over the next few weeks. This one is sure to become a fan fall favorite. It's called Spooky Window Set and it's available NOW at the store. This set also is sized to coordinate perfectly with the Shadow Box Window Die which allows a 3D look. 

The sentiment surrounding this image was too good to hide so I cut the window and created a stitched frame in purple glitter paper with the Square Double Stitched Rectangle Set to make it visible. The card opens and the image shows through from the inside. I colored the images with various orange, purple, yellow and brown Copic colors. The cat is its own image and the set includes the die for it. I had to make this one black using cool gray Copic Colors. To add some magical sparkle to the card, I used a strip of pearl and black gem bling and purple cardstock with a hint of glitter in the pattern. 

One of my favorite things about the Windows to the World series is that the images are small and it doesn't take long to color them up in your favorite medium of choice. From pencils, to markers, to watercolor, it all works wonderfully and quickly! 

Happy Creating!
Janet YouTube - Blog - Facebook - Instagram - Pinterest