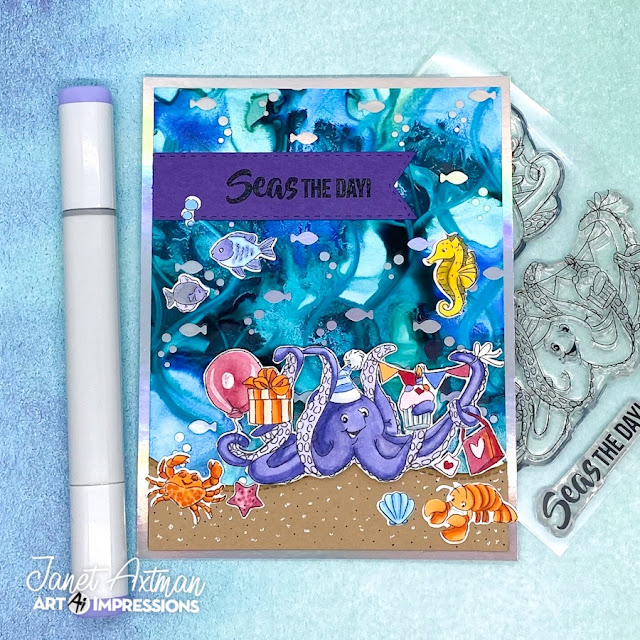
Hey everyone! It's Janet posting this week for the Oceans of Fun challenge going on at the Art Impressions blog. The challenge is all about water.
Hey everyone! It's Janet posting this week for the Oceans of Fun challenge going on at the Art Impressions blog. The challenge is all about water.
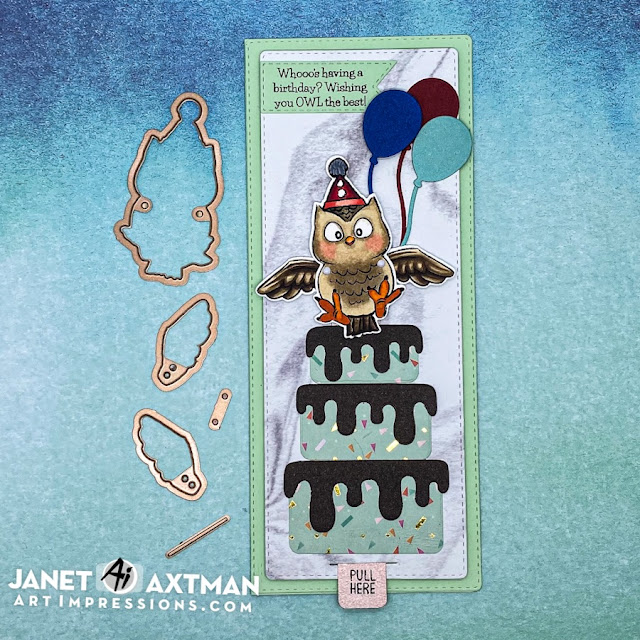
Hi crafty friends! Today I have a slimline card that combines several unrelated Ai sets to create a fun interactive birthday card. This card was made with the 5463-Slimline Dies Set, 5407-Birthday Cake Gift Card Holder Set, 4972-Owl Flutter Set and 5133-Flag Double Stitched Dies.
The card base measures 8 1/2" by 3 1/2" when folded. On top of the base, I placed a matching cardstock piece cut with a Slimline Die. The next sized die in the set was used to cut the gray marbled mat. I placed the three layers of cake from the Birthday Cake GCH on the gray mat and then stamped, colored and cut out the adorable little owl from the Owl Flutter set on marker paper. I also cut a long pull tab out of rose gold metallic cardstock. I followed the easy Flutter Owl package directions to assemble the winged mechanism and tab and install it under the gray mat. Once done, I glued the gray base on top of the green matt being careful not to glue on or too closely around areas that move. Then I trimmed the tab to the right length and stamped it with a Pull Here stamp from my stash.
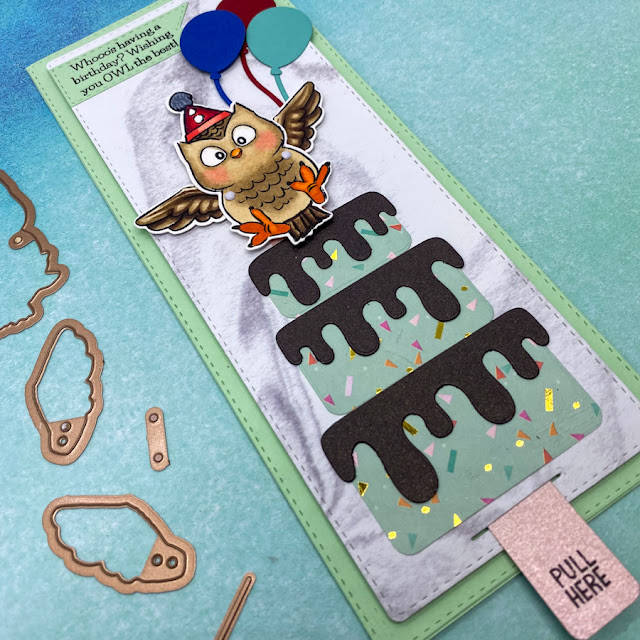
The finishing touches were to stamp the sentiment from the Owl Flutter Set and cut it out with a flag from the Flag Double Stitched Dies set. I also cut three balloons with dies from my stash and arranged all the extra pieces on the card.
Once complete, pulling and pushing the tab causes the owl's wings to move up and down. I really like how this looks like the owl is landing on top of the cake to wish the birthday recipient. "owl the best!"

Thanks for stopping by today. Please join in on the Ai card challenge. You might win some swag of your choice and challenge yourself with a new technique. Win, win! Click on the graphic above to link up your card.

This is made with the Art Impressions 4863 Irresistible Set. I really love her bed. It’s just like the antique brass bed I had when I lived at home so many years ago. I think I would have picked this one up just because of that but it also makes up some great cards with just the right amount of light heartedness.
This is an A2 card that folds at the top. I used XXX in Basis cardstock. Basis is an 80# weight and I highly recommend it for it's solid core, smooth surface and beautiful colors. It's outstanding used as card bases but it also cuts wonderfully in both metal dies and on electronic cutting machines. The beautiful pink cardstock is Pink Quartz Stardream Metallic cardstock. It is so lustrous and beautiful! You can get both cardstocks at great prices at CutCardStock. If you haven't checked them out yet, you really should.
The beautiful border on this card is from one of my new favorite rectangle nesting die sets from Spellbinders. This one is called Candlewick Rectangles. It can be run through twice to create embossed details. In this card, I did not take that extra step. I just really love the circle/diamond pattern it creates around the edge. It's really different and adds a lot to a card.
I stamped this onto marker paper and colored it with Copic colors. I used the package illustration to guide my shading and color choices. I think it’s great that you can always use the package illustration for an example. One thing I changed up though was the bed color. I made mine into a brass bed of course!

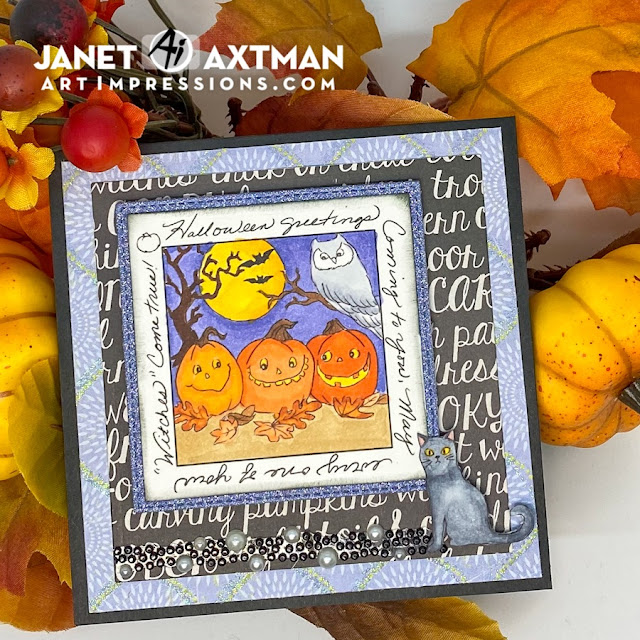
New releases are starting to come out at Art Impressions. Woohoo! There's so many amazing sets coming out for everyday, fall and winter/holidays. Today I'm showing the first of several new Window to the World sets that will get announced over the next few weeks. This one is sure to become a fan fall favorite. It's called Spooky Window Set and it's available NOW at the store. This set also is sized to coordinate perfectly with the Shadow Box Window Die which allows a 3D look.
The sentiment surrounding this image was too good to hide so I cut the window and created a stitched frame in purple glitter paper with the Square Double Stitched Rectangle Set to make it visible. The card opens and the image shows through from the inside. I colored the images with various orange, purple, yellow and brown Copic colors. The cat is its own image and the set includes the die for it. I had to make this one black using cool gray Copic Colors. To add some magical sparkle to the card, I used a strip of pearl and black gem bling and purple cardstock with a hint of glitter in the pattern.
One of my favorite things about the Windows to the World series is that the images are small and it doesn't take long to color them up in your favorite medium of choice. From pencils, to markers, to watercolor, it all works wonderfully and quickly!

Hello all! Today's card features another use for the uber cute Sewing Room Matchbook set from Ai. I thought it would be fun to use a fancy fold to build on the sewing theme so I've mixed the stamps and dies with a drapery fold and some stitched looking cardstock on this card. This is just perfect for a friend of mine who loves to sew!

 Today I've made a tunnel card for you. It's a fun fold that builds up a layered and dimensional look. It's a perfect style for scene building. In my tunnel, I've created a bee-utiful bee Christmas tree trimming party! Can you hear the singing? I feel like I can.
The tunnel card base was created with a card blank set from PhotoPlay. These are sold in packs of 6 and you can customize them with your own dies, papers and embellishments.
I chose images from the Christmas Bee set, #5042. I stamped them on 300 Series Strathmore Bristol cardstock and used Tombow markers and a colorless blender to make these come to life. There are enough images to do several different cards in this set. I used most but not all of the images and only one of the seven sentiments included in it.
I decorated the tree image with red and silver stickles. Other than that, I added no other embellishments. These images stand on their own and I didn't think I needed more to create the happy scene.
I made a video with all the details. You can see it by clicking on the thumbnail below:
Here's a closer look at the tunnel scene.

And here's a little closer look at the card front. I imagine she is THE "Queen Bee." I always thought the Queen Bee would be kind of scary but she is a friendly, happy sort!


In today's project, I've combined two of my favorite things - shaker windows and a loveable kitty. This little cutie is one of four animals in the Loveable Animals set. It comes with accessories for the animals to hold and several sentiments. Each animal die cuts open the arms so that the characters can hold a package, a piece of paper, a cupcake and more.
This kitty was Copic colored. The colors can be found at the end of this post. In the video for this card, I show you how to make a simple cat with some basic shading as well as how to take it up a notch and add his stripes. I'll also give you a few tips on how to make the window frame for a shaker and on placing a shaker element on a card base. The full tutorial is below:

After making a gift card using all the pieces in the die (check Thursday's post for a peek at it). I decided to try making them into shakers. To my delight, it worked beautifully. I used the included cake dies to cut borders into the two bottom layers. This allowed me to create windows for the shakers.
Don't forget that this set is made to coordinate with the Envelope Gift Card Holder. It is a great set all by itself because it comes with several tags and shapes. I used the flag tag for the sentiment. Big Birthday Wishes comes from the Baby Animals Set. It fit perfectly and goes with the big cake theme!
I have a video for you that shows how I made the shaker gift card holders. Check it out below.
 Welcome to my crafty happy place! Please be sure to check out all the places you can find me below.