Showing posts with label Handmade Card. Show all posts

Love Your Pets Hop and Giveaway | JessicaLynnOriginal Stamps | Flynne's Puppies


Happy Saturday everyone! Hope you are having a great weekend so far.

Card Interior Sentiment (included in set)
Today I have a very special post announcing one of the coolest blog hops I've ever encountered. This hop features two pet stamp sets designed by JessicaLynnOriginal Stamps. I have the honor of participating and bringing you three posts this week beginning with the first which is a video tutorial of how I made this Corgi Thank You card.


GIVEAWAY!! YAY!!
In honor of participating for the very first time with Jessica Lynn Original, I'm GIVING AWAY a brand new Flynn's Puppies stamp set (the same set I use in the video) to one lucky YouTube subscriber who comments! Winner will be announced on April 30th. Drawing is open to International and US participants.Please go to my video by clicking on THIS LINK or by clicking on the video thumbnail below:


A special feature of this hop is that money is being raised for a shelter near Jessica Lynn in Wisconsin. We are going to be raising money for a pet rescue group called Lucky Mutts Rescue. (https://www.luckymuttsrescue.org)

For each card that is uploaded on the Jessica Lynn Original blog post linky featuring a JessicaLynnOriginal stamp, they will donate 50 cents. For each that features another company, but is a pet stamp will get 20 cents.

They will also have a donate link on their site so if people just want to donate to them. If we raise $50 or $5000 all of the money is going to a great location. This is our first year, so they are hoping that they can do this each year.. and add more and more people to the event!

 A big thank you to Jessica for giving me the honor to use one of her awesome stamps and participate in this hop.

Find the blog hop and the Jessica Lynn Original store by clicking on the links below:

Blog Hop Post:

JessicaLynnOriginal Store

I want to give some special love to the fellow YouTubers participating in this hop. Please check out their channels and support them by commenting and subbing if you like what you see! Tell them Janet sent you!

Hop Videos:

Jessica Lynn Original Channel
https://www.youtube.com/jessicalynnoriginalrubberstamps

Karen Seifert
https://www.youtube.com/channel/UCaDuTLMz6n7QWaB43BXhyFA

Maria Russell Designs
https://youtu.be/IGZW2JvyEEk

Thanks so much for joining me and be sure to stop by during the week to see the two additional cards I'll be posting.

Hugs,
Janet

I'm entering the following challenge:

10 Cards 1 Kit | Creative Escape Papercrafting | April Fully Loaded Kit | Part 1


Hi guys! Well, today I'm posting my very first Design Team video for Creative Escape Papercrafting! Every other month, I'll be featuring one of their fantastic Fully Loaded Kits. The cards I'm showing you in this post are from the April Fully Loaded Kit. I have five cards in this video and will do a follow-up video shortly with cards 6-10.


This kit is full of wonderful products that will get your creative juices flowing. The main features are 12 sheets of 6 x 8 specialty card stock from the Maggie Holmes Flourish Collection but also included are the Flourish Collection's 48 piece ephemera kit, a 12 x 12 cut apart sheet, a wood frame and several mini tassels. Also included are two wonderful stamp sets, a Lawn Fawn Spring Sprig die set, a bottle of Nuvo Crystal drops, 2 small wood frames, 5 small wood hearts, assorted printed tags, 7 8 1/2" x 11" card stock, 5 yards of ribbon and two white fancy tags. One of the best parts of this kit is a small baggie of Nuvo Rose Gold Gilding Flakes. I have had SO MUCH fun with these flakes and two of the cards in my video utilize them. To see a complete list of products in this fantastic kit, please visit their WEB SITE.

Here is the video for my first five cards. Click directly HERE or click on the YouTube thumbnail to launch the video.


Thanks so much for spending some time with me today. I hope you have had a great week and I'll see you again on Saturday.

Hugs,
Janet

Spring Floral Gratitude

Hello and Happy Valentines Day! I'm here again with another video tutorial for CottageCutz. This time I'm showing off one of the largest dies in the new Spring 2018 Release called Fresh Spring Floral.


My thank you card includes the Expressions Plus Grateful die at the bottom. Inside, I used the Thanks Expressions die. All three dies are available in the store.

This is a pretty simple A2 card base in black card stock. The black background makes the pastel colors in the wreath pop. The white frame was created with an embossing pen and white embossing powder. The raised glossy frame gives it an almost nostalgic look, like the old fashioned photo albums with white writing. The Grateful Expressions Plus sentiment is cut from textured red foil card stock to add a little glamour without competing with the wreath.

I hope you'll take a few minutes to watch the card construction tutorial. As always, just click on the YouTube thumbnail below. If you have trouble using the thumbnail, you can also follow this link directly: Fresh Floral Gratitude Video Tutorial


That's it from me today. Thanks for visiting!

- Janet

Dies Used In This Project:


Love You Deerly Popcard

Hello and welcome to my blog. Today I'm featuring my first Valentine's Day card of the season and I'm super excited about it! This card features the cutest deer that is all tangled up in a string of heart lights.

Click on the video thumbnail above to see the video. If that isn't available on your device, you can click on the included link instead.
3D Deer Popcard video link

Most crafters are always searching for good deals. To that end, I was out at Michaels not too long after Christmas when they were clearancing their Christmas items at 70% off. There was a Popcard set from Art Impressions (Hampton Art) that I wasn't familiar with but I was pretty intrigued by it. It's a stamp and die combination that allows you to create a really big pop-up element in a card. I decided that the reindeer Popcard was just too cute and inexpensive to pass up. Although the reindeer is super cute I didn't want to wait until next year to use him. I thought there had to be a way to alter him for Valentine's Day. After "racking" (LOL) my brain for a while, I figured out a way to do it.

Here's my remake of this cutie to fit the Valentine theme. I covered the light stamps that were in his antlers with small metallic hearts. This transformed his Christmas lights into Valentine lights. I changed out his red Rudolph nose for a black one and added white nostrils. Then instead of putting bells on his collar, I added more of the metallic hearts. These changes made him look more like a regular deer than a reindeer.

The popup feature in this set is really awesome. He stands a full 3/4" above the card base so he's super dimensional. I did have a little trouble putting him together. Afterwards, I finally took a look on YouTube to see if there were any tutorials out there. Well, I should have looked for that first. I made it more difficult than it had to be. I also discovered through the videos on this that there is a whole series of different Popcards that have been created. If you purchase any of the Popcard series, be sure to look for the AI tutorial which clearly shows the assembly and some key tips to make it easier. The package instructions are woefully incomplete and will only leave you tearing your hair out if you rely on them alone. Just saying from my own experience! Now that I get it, I'm going to purchase some more of these Popcard designs. They are really fun.

In the end I was happy with the results. The only problem was that I concentrated so hard to get the phrase Deerly inside the card, I spelled it Dearly instead of Deerly! Hopefully my 12-year old son won't pick up on that when I give it to him. LOL!

Thanks for stopping by. Keep an eye out as I plan to post several Valentine projects in the next few weeks.

-Janet

Santa and Snowman Window Cards

Hey everyone! It's Janet dropping by to show you two cards I made using two new holiday release dies. The first is called Window With Shutters and it has a great window, complete with a header, flower box and shutters. This die could be used year round to create a cute window scene by itself or filled with characters of your choosing that fit in the window space.
.

Today, I chose to use the companion die set made just for this window called Window Christmas Friends. It includes adorable Christmas figures including a pine tree, Santa, Snowman and Poinsettias with greens for the flower box.


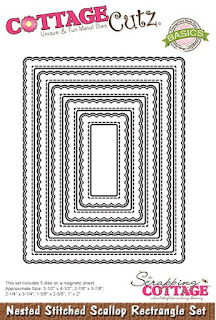
Since the Santa and Snowman are both cut when you use the set, I decided to use both in each card. Nothing should go to waste right?! For Santa, the snowman is saying hi when you open the card. The opposite is true if the snowman adorns the front. I also used the Nested Stitched Scallop Rectangles inside for the stamped sentiment and die cuts. These are such cheerful little figures!


To learn how I made this card including how I created the acetate window effect, click on the video below. I hope you enjoy this one because I had a lot of fun creating them!

Have a great week and thanks for spending some time with me today.

Hugs,
Janet
SugarShine Designs


Dies used for this project:


Wedding Cake & Butterflies Wedding Card

Happy Sunday! It's a beautiful day and I want to share some creative inspiration with you. 


Today's project is a card featuring the beautiful new CottageCutz Tiered Wedding Cake die. I had a lot of fun putting it together. It has a lot of small pieces but I found a way to make them easier to manage and color. I share this tip with you in the video and show you how well it works. You may have seen it before but you'll get to see it in action in the video.


The card also features the new CottageCutz Nested Stitched Eyelet Oval Set, the Celebrate Expressions Die, Butterflies, and the Leafy Foliage dies. 


I cut all the pieces in white card stock and used my Spectrum Noir markers and clear Wink of Stella so that each of the die cuts complemented each other as a set.

For full instructions and a look at how it was put together, click on the video link below.


It was great spending a little time with you today. I hope the rest of your weekend is great!

- Janet

Dies Used In This Project:


Elegant Wedding Card


Hello friends! I hope you are having a great week! It's the middle of the summer wedding season so I thought I'd make a wedding card using some beautiful CottageCutz dies you can find in the store. Click below for the video tutorial showing how this comes together.


This is a 5" square card that features the Bride & Groom die on the front in holographic white card stock. I just love this simple but beautiful lacy die that is so smart, it cuts out the groom's bow tie so it can stand out. Very elegant! The couple is attached to a 4.75" square black embossed card stock that is lifted off of the card base with a 4.5" square of fun foam. This is a great way to get a little lift but not make it so thick that it can't be mailed. Across the couple, I placed another die called Tweet Love. It includes the Love sentiment and also two "tweet" little birds. I thought the birds were too big for my design but they are cute! I saved them to decorate the envelope. As a substitute, you could choose the new Love Expressions die or give it a slightly different twist by picking Celebrate, Adore, Dream, Cherish, etc. The pretty script in those dies would match the elegant feel of this card perfectly. To finish the front, I used three metallic flower sequins and white gems.


Inside I used the largest square from the Stitched Square set and added the lacy Balloon Bouquet die in the same white holographic paper as the Bride & Groom on the front. The balloon die is super versatile. It would work for any elegant celebration from birthdays, parties, weddings and anniversaries.


Thanks for joining me today. I'll see you soon with another video tutorial!
Janet

Dies used in this project:


Hello my crafty friends! Father's Day may be over but I've still got masculine cards on the brain. This week's project  is called a double-fold card and is also known as a Joyful card fold. This is a nice fold design because it starts out a normal A2 size but once opened expands to three panels and 10.25" wide.


I used many different CottageCutz die sets to create this project but if you don't have these dies, just substitute with different dies or whatever you have on hand. This same idea can work on a number of different themes. Just start by thinking about what you want to use for the closure and then go from there.

In my case, I started with the tree from the Grass, Trees & Vines set and built the rest around the outdoors theme. I also used all the dies from the stamp and die set called Woodlands. The detail in these stamps and dies are awesome. You can color these any number of ways but I chose to use my PrismaColor pencils. I colored the dies from the Fishing Gear set with distressed ink. 

For complete instructions and dimensions, please visit my YouTube Channel by clicking on the video image below. As always, ask any questions you have and give me a thumbs up if you enjoy the video. If you haven't already, please subscribe so that you won't miss any future CottageCutz videos. Thank you for supporting the channel. I appreciate every one of you who follow me across any of my social media platforms.

 Click here for video

Dies Used in This Card:


Thanks for spending some time today with me today. See you again soon!

- Janet

Creating with Cricut - Congratulations New Citizen Card!


Here's my shameless plug to follow me on whatever media works best for you. In addition to facebook, email, Bloglovin or Google, you can now go to my YouTube Channel and subscribe there as well. I post every Saturday so don't miss a thing!

This Saturday is a quick card I made for someone I work with who is becoming a new US Citizen. You can easily change the colors and the USA tag to make this into a thank you or birthday card.

Click on the video to see how to make this fun and easy card using paper, glue and your Cricut machine! There are no stamps used for this project.
The sizes and supplies can be found in the video's description on YouTube.

I'm excited to participate in these card challenges:
Crafty Gals Corner Challenges #110 Use Your Favorite Things
Jo's Scrap Shack #176-AG