Showing posts with label Halloween Cards. Show all posts
Sunday, October 10, 2021
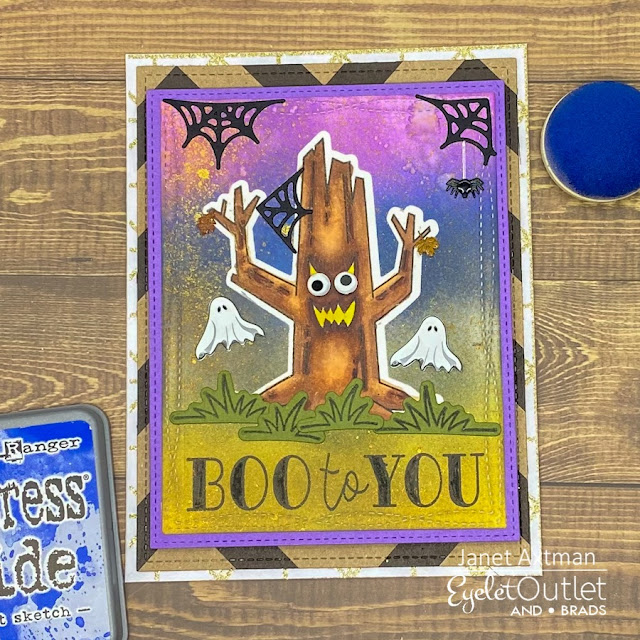
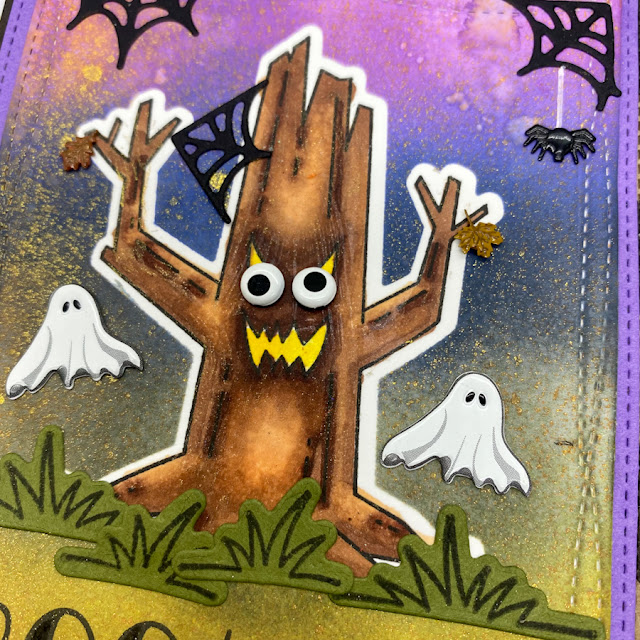
Hi everyone! It's my day on the Eyelet Outlet blog and I've got a fun, sorta spooky A2 sized Halloween card for you today. The spooky tree is accented with Ghost, Eye, Mini Leaf and Spider brads. I love how the eyes give the tree a real personality!
The images and sentiment in this card are from the new Diamond Press Peek-A-Boo set. I stamped the tree first on Copic friendly cardstock. Then I colored the tree with a brown blend and used a bright yellow marker for the eyes and mouth. I cut a mask for the tree and put it over the colored image. I did the ink blending with oxide inks and then splattered the panel with water and Dylusians White Linen Spray. The webs are from the new Art Impressions Web Dies Set.
This was a fun card to make. What Halloween cards are you making this year? Check out the EO store for all your fall and Halloween embellishments!
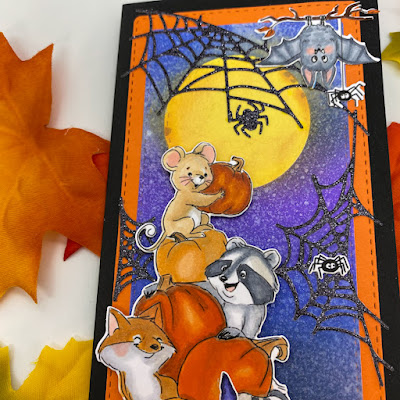
Have you seen the new Halloween releases from Art Impressions yet? Oh my goodness! They are adorable! Today's project uses the new Halloween Slimline Set, the Slimline Dies Set and the Web Dies Set. These little trick or treaters are way too cute to spook!
I am so happy that Ai has added a slimline die set. This has 6 stacked dies. As a bonus, it includes a long flag die too. For today's card, I used the 3rd largest die for the main panel and stacked it on top of an orange panel cut with the 2nd largest die. I love the stitching and it matches all the other stitched die sets from Ai.
I haven't done a construction video for a while but I have one today! Click on the thumbnail below to see how I created this card.
One of the great things about the new Halloween Slimline Set is that it comes with matching dies for every stamped image except for the skinny Halloween letters. However, I did notice that the flag in the Slimline Dies Set would cut that phrase out perfectly.
I colored the images with Copic markers and then created a background panel using several Oxide inks in Forest Moss, Black Soot, Chipped Sapphire and Blueprint Sketch. I created the moon by cutting a mask with a die from the Round Double Stitched Die set. The negative of the cut was used like a stencil to fill in the moon with Squeezed Lemonade and Spiced Marmalade. Then the circle itself was used as a mask to protect the moon while I blended the much darker sky around it.
Water and Dylusions Spray in White Linen was used on the inked panel before I arranged all the pieces on it. The critter wagon (as I like to call it) was mounted with double sided foam tape. I cut the webs out of black glitter cardstock and attached them and the other images to the panel with Art Glitter Glue. I have to say that I adore the hanging bat from the set. I think he could carry a card all by himself, he's so cute! He even has tiny little fangs. The last thing I did was stamp the sentiment Trick Or Treat on the bottom of the card using a phrase from the Halloween Critters Set.
Thank you for stopping by today. I hope I've encouraged you to check out all the new releases from the past two weeks at the Ai store. There's more coming so keep your eyes and ears on! You're going to love the new designs. In the meantime, join us in the slimline card challenge going on now through Wednesday next week. You could win up to three sets of your choice!
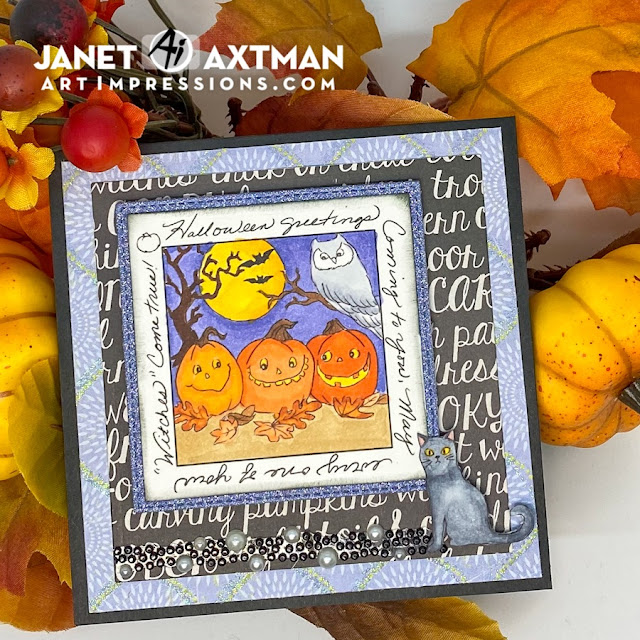
New releases are starting to come out at Art Impressions. Woohoo! There's so many amazing sets coming out for everyday, fall and winter/holidays. Today I'm showing the first of several new Window to the World sets that will get announced over the next few weeks. This one is sure to become a fan fall favorite. It's called Spooky Window Set and it's available NOW at the store. This set also is sized to coordinate perfectly with the Shadow Box Window Die which allows a 3D look.
The sentiment surrounding this image was too good to hide so I cut the window and created a stitched frame in purple glitter paper with the Square Double Stitched Rectangle Set to make it visible. The card opens and the image shows through from the inside. I colored the images with various orange, purple, yellow and brown Copic colors. The cat is its own image and the set includes the die for it. I had to make this one black using cool gray Copic Colors. To add some magical sparkle to the card, I used a strip of pearl and black gem bling and purple cardstock with a hint of glitter in the pattern.
One of my favorite things about the Windows to the World series is that the images are small and it doesn't take long to color them up in your favorite medium of choice. From pencils, to markers, to watercolor, it all works wonderfully and quickly!
Hello crafty friends! Today I've got a pair of hauntingly cute Halloween cards. These are made with images and sentiments from the Art Impressions Happy Haunting set #4940. These cards are my interpretation for the Going Batty Challenge that just started this past Thursday.
Both cards are set at night. The first one I worked on was the A2 card using the happy little critters that are enjoying their costumes and treats. I colored the characters with Copic markers and then fussy cut them out very close to the stamp border. I inked up a bright yellow piece of cardstock with Distress Oxide different purple and black inks. Before doing so, I used a cut circle from the Ai Circle Double Stitched Die Set for a moon mask. Once inked, I splattered the panel with water and then with a white iridescent spray. After drying, I stamped the tops of two trees in the set around the top of the moon. I added bat images using the included stamp. Some orange inking was done on the yellow moon. Additional white dots were added with a gel pen. The sentiment was heat embossed on velum and sequins were used to hide the glue holding it in place. Finally, I added the critters across the front of the moon. These characters look like they are having the best time on Halloween night!
To begin the second night scene, I used my Silhouette machine to cut a file from Paige Evans to get a whole background of bats. I put black glitter cardstock behind the background so they would show up well. The background was done in light gray cardstock. I sprayed it with both white and green iridescent sprays. While that dried, I colored the owls and fussy cut them out. A large circle die cut was cut from yellow cardstock and the edge was trimmed to be flush with the bat panel. The tops of the trees were again stamped to create the branch background for the owls. The edges of the bat panel were darkened using distress oxide ink. The owls were nestled in the branches and I stamped the bat in the background. The sentiment is heat embossed in an eggplant color. A few sequins finished up this card nicely. I love how one of the owls are staring down at the spider below them.
I hope you enjoyed seeing my take on these night scene cards that are spooky but not scary. Please link up your project for our Art Impressions Going Batty Challenge. It can be any Halloween crafty project and it's not limited to cards. You can win up to three stamp sets of your choice!
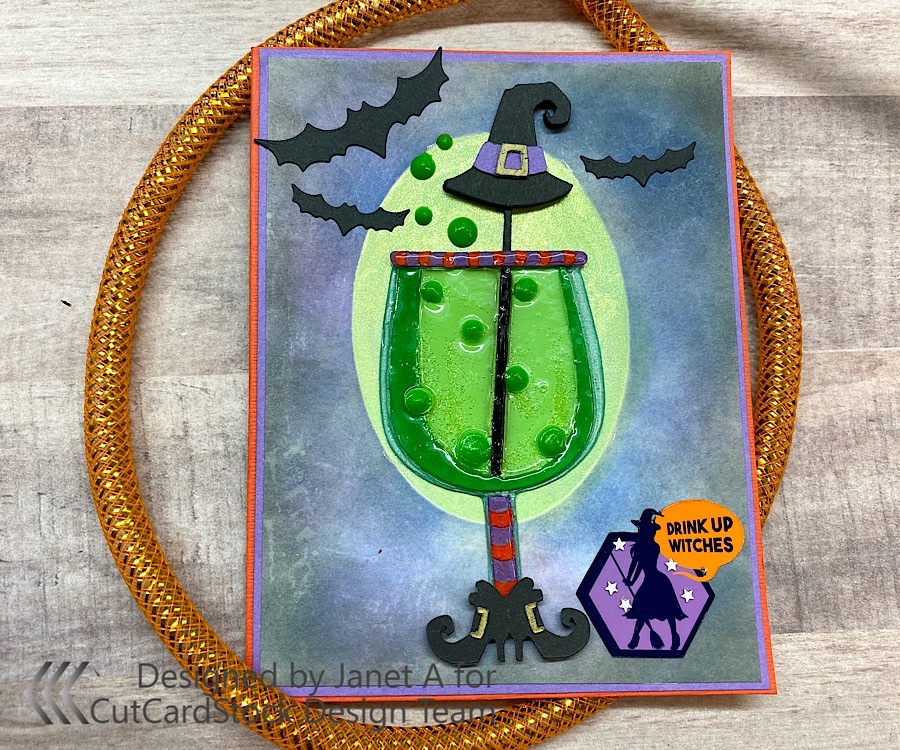
Mix yourself up a ghoulishly fun Halloween card with CutCardStock and a few other supplies. This one has a few steps but is so totally worth it to get the look of a transparent glass complete with fizz, bubbles and a few bats to spare!
Because this is hard to get a good photo of, I've made a video tutorial for you. There you can see much better how cool the drink looks on this card.
The A2 card base is formed using Odobo Orange cardstock. It's also used for the goblet rim and stem. The goblet's base shape is made with Stardream Metallic Lagoon. Pop Tones Grape Jelly is used for the card panel mat, the witch's hat band, goblet rim and goblet stem accents. The hat, boots and bats are Basis Black cardstock. The green liquid is Pop Tones Limeade Cardstock. The main card panel is Neenah Classic Crest Solar White. Smaller bits of that were also used for the buckles. To get a metallic look, I colored them with a gold paint marker.
To ink the card panel, I started by covering it with Antique Linen Distress Ink. Then I applied an oval paper mask so I could ink up the night sky around the "glow" without covering it up. After the Antique Linen, I used Oxide inks in Blueprint Sketch, Wilted Violet and Black Soot. Then I removed the oval mask and applied the negative mask from the oval cut so I could work just on the glow element while protecting the dark areas I had already blended.
To make this area glow and also seem to cast light through the goblet, I needed to make it a bit more green than the Antique Linen by itself. I blended a coat of Cracked Pistachio Oxide ink first. Then I applied a coating of Cosmic Shimmer Opal Blaze Polish in Gilded Avacado. This gave it the perfect greenish glow!
I found the goblet cut file in the Silhouette store but if you don't have a Cameo, you can purchase this file as an .svg and use it on any cutting machine that accepts an .svg file. Except for the main glass goblet shape, I glued 2 layers together to form a more substantial die cut. The hat drink stirrer has three layers so that the stir section looks more dimensional. I applied a fourth hat layer on foam tape for additional dimension. The boots are also lifted on foam tape.
Inside the glass, I applied small areas of glue at the bottom and in vertical lines to the top. Then I applied microglitter in a lime color. I was aiming to create a fizzy look with the glitter. I then applied the cut bubble pieces in the areas of the glitter so the bubbles are coming up with the fizz.
Next I covered the entire goblet with Glossy Accents. The cut cardstock bubbles resisted being covered due to their height and this was another reason I put them on even though I would cover them up eventually. Once dried, I used Beads in a Bottle in Peridot on the bubble cuts. I also applied a few bubbles outside of the glass using the Beads in a Bottle. Then I applied the bat die cuts.
My sentiment was made from a Cricut File. It is the witch figure and the speech bubble. I placed her on a purple and black octagon and converted it to a print then cut graphic. Look for cut #M10001F4A in Design Space.
This is a fun card to make and looks great when completed. Unfortunately, it is hard to get a great picture of it because of the shimmer and shine on and around the goblet. I hope you'll give it a try!