Hi everyone! I'm here today with a fun fancy fold. It's called a Double Z Fold. I had fun making this especially since I haven't done a fancy fold in a while. As with most card folds, this one has a lot of flexibility and looks depending on the patterns, colors and embellishments used.
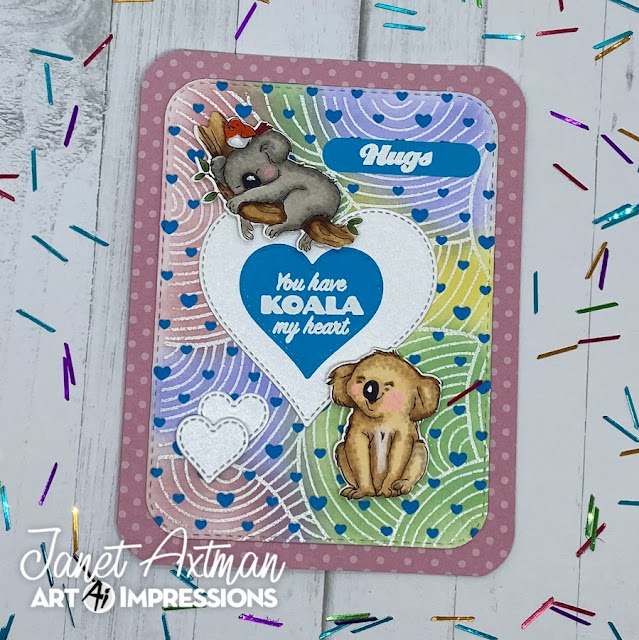
A Koala-tea Good Time
In the first card, I colored two of the koala images and used the included dies to cut them out. I cut out the stamped and inked panel with the largest Ai Rounded Rectangle Double Stitched Die. Then I used a cover plate die from Lawn Fawn called Polka Heart Backdrop to cut out the tiny hearts. Behind the panel, I placed blue cardstock creating a confetti of blue hearts in the background. Then I arranged the two koalas and several hearts as well as the two sentiments on the panel. The finished piece was then glued on the card base.

Mouse & Cat Valentine with a Twist
Cool As a Cumber Workout Gal
Why Can't I Be Queen?
Thanks so much for joining me here today. Don't forget that our current Art Impressions challenge Get in Shape is running through Wednesday of next week. A new challenge will be up on Thursday. Submit your shaped cards (no rectangles or squares) for a chance to win Ai stamps of your choice. Click on the image below to be taken to the challenge post and link up your creation.

So Irresistible!
This is made with the Art Impressions 4863 Irresistible Set. I really love her bed. It’s just like the antique brass bed I had when I lived at home so many years ago. I think I would have picked this one up just because of that but it also makes up some great cards with just the right amount of light heartedness.
This is an A2 card that folds at the top. I used XXX in Basis cardstock. Basis is an 80# weight and I highly recommend it for it's solid core, smooth surface and beautiful colors. It's outstanding used as card bases but it also cuts wonderfully in both metal dies and on electronic cutting machines. The beautiful pink cardstock is Pink Quartz Stardream Metallic cardstock. It is so lustrous and beautiful! You can get both cardstocks at great prices at CutCardStock. If you haven't checked them out yet, you really should.
The beautiful border on this card is from one of my new favorite rectangle nesting die sets from Spellbinders. This one is called Candlewick Rectangles. It can be run through twice to create embossed details. In this card, I did not take that extra step. I just really love the circle/diamond pattern it creates around the edge. It's really different and adds a lot to a card.
I stamped this onto marker paper and colored it with Copic colors. I used the package illustration to guide my shading and color choices. I think it’s great that you can always use the package illustration for an example. One thing I changed up though was the bed color. I made mine into a brass bed of course!
0, C1, C3
E00, E21, E23, E25, E09
B00, B01, B04, BV02, V17
RV21, R24, YR02
Santa Clause Is Coming To Town!
Hedgehog Fall Window Scene
In this project, I chose the adorable hedgehog from #5191 Feast Mode Set. There are many cute characters and sentiments in this set that are perfect for fall. Three of the four critters in the set could be used in the ShadowBox die. I cut the shadow box piece and stamped on it. Then I colored this cutie with Copic markers. This is a really simple and quick image to color up. I have put the Copic colors I used at the bottom of this post.
Please stop by my channel to see how this was colored and constructed. Click on the thumbnail below.

It's Lla-Mazing! New Llama Set You're Gonna Want to See!
Ll'amazing things are happening at Art Impressions right now! Not least of which is the super fun new Llama set that was released this week. This set includes several llamas and accessories that can be used together or alone. There are many fun sentiments in this set too. They are hilarious in fact!
Today's card shows of the pair of llamas with the stack of presents and cake as well as the basket of flowers. These are only a few of the accessories that are designed to be used separately as I did. Optionally the accessories are designed to fit perfectly on the back of a single llama also in the set! There's a lot of flexibility in this one and soooo many great images and sentiments.
This set also includes matching dies so you can quickly cut out the images for your cards. I sure do appreciate that! I'm not a fussy cutting fan though I know many say they find it relaxing. On this card I colored up the llamas with Copic markers and added a little texture into their fur. I also added designs to the presents to make them my own also.
I've got a video on this set and how I made two cards using this set.
On the other side of this slimline, I used a semi-circle cut with the double stitched circle set for the sentiment from the set and enhanced it with the basket of flowers. All the accessories are nicely sized and could easily be used as a single image on a clean and simple card. I love that about this set! I also used a strip of champagne colored long zig-zag bling from Eyelet Outlet at the top of the card. It has a middle-eastern flair that felt right for this card.
Thanks for stopping by today. I hope you have a fantastic week!
Happy Creating Everyone!
Minty Fresh Reindeer Stackers!
Autumn Window Scene - You Have to See It!
I am totally in love with the newest Windows To The World sets issued this week by Art Impressions. In case you're not familiar with them, the line features miniature peeks into a scene and always include a separate stamp to use as a 3D element. They come with dies as well. They also always include a hand written message around all sides of the image. Today I'm featuring the new #5449 - Autumn Window Set. I'm a big fall lover and this scene doesn't disappoint!
A Mini Garden Shed - It's a Beauty!
These enticed me to take a little break from fall and Christmas and explore this fabulous garden shed. It's a darling little world of flowers and pots you are likely to find in every garden shed throughout the world. The details of blossoms, herbs, garden gloves and even the peek of a watering can make this scene so much fun to create, give and receive!
To make this card, I stamped the images on marker friendly card stock. I chose many bright Copic marker colors and a few pastels. I really didn't think about what colors to use but just colored one stamp at a time working in sections. I chose the hues as my mood directed. I find coloring this way is the most relaxing. I just let go of the thinking part of my brain and allow my creative side to pick colors. Before I knew it, the images were all done and ready to cut out and put in the matchbook template (sold separately #5317). The template is the card base that the individual stamped images fit into.
All the matchbook sets come with dies to match the stamps. I cut them the Flower Shop images, folded the tabs on each stamp and used the tabs to glue them into place in the matchbook base. When done, the stamps fold in so that you can close it up and give it to someone. For your convenience, there is an optional die for a matchbook envelope (#5318). Both the matchbook template and the envelope will work for all the matchbook scenes so you only need to buy them once.
I will mention that the Matchbook Templates are currently out of stock at the Ai Store. I checked several of their resellers and they're out of stock too. Obviously the matchbook cards are selling like hot cakes! If you are wanting to purchase the template, I advise you create an account on the Ai site and use the notification feature. That way you'll be emailed when they are back in stock and you can complete your order. You can also periodically check Simon Says Stamp, Scrapbook.com and Ellen Hutson. At this time they are also sold out but they might stock it sooner so it's good to keep an eye out. The pricing is the same no matter where you purchase them.
I hope you enjoyed this fresh little matchbook card and will go check out the entire matchbook line. There are a lot of them now and there's definitely something for everyone. Have a wonderful creative weekend everyone!
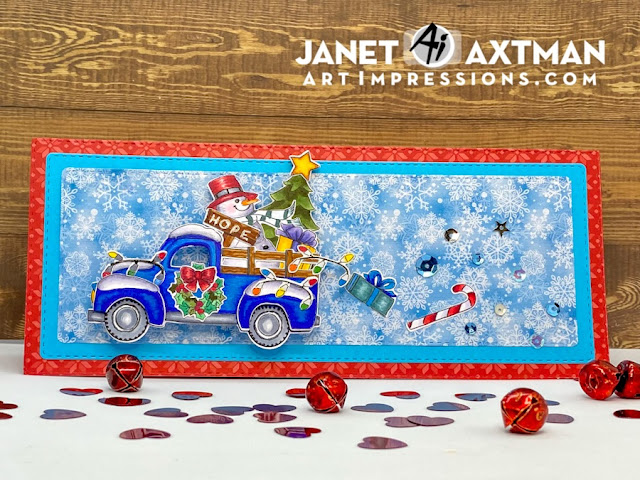
Christmas Truck - So Cute!
Hello! Have you seen the new Art Impressions Rides Interactive Series just released? So far there are three stamp sets and they are awesome. I especially like that all the images are interchangeable between the three sets. The images can also be used on their own without the cars or trucks to give you maximum versatility.
Today I'm showing you the card I made using the new Christmas Truck Set and the Slimline Dies Set. There is a lot packed into this one. It includes the truck, separate fenders for the wheel wells, two presents, a tree, a candy cane, wreath, snowman, star, bow, string of lights and sign. I really love that this set comes complete with matching dies. That's a lot packed into one set!
I invite you to watch the video I made for this card. Find it by clicking on it below.
I chose to create a slimline scene. After arranging goodies into the truck, I put it on an action wobble. It's so fun to make the truck shake. I arranged a package, candy cane and some magic dust (aka sequins!) to the rear of the truck. This makes it appears that along the way, a few things escaped!
I hope you enjoyed the card I made for you today. I invite you to make a visit to the store to see all the wonderful new stamps sets released so far!
So Cute Critters In a Wagon! Art Impressions New Release
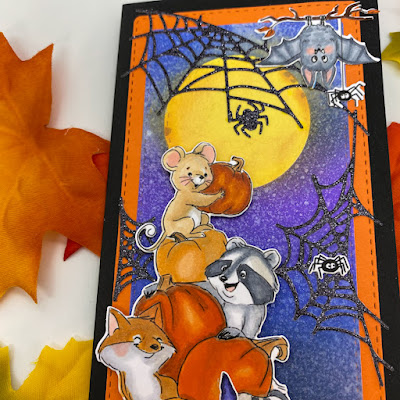
Have you seen the new Halloween releases from Art Impressions yet? Oh my goodness! They are adorable! Today's project uses the new Halloween Slimline Set, the Slimline Dies Set and the Web Dies Set. These little trick or treaters are way too cute to spook!
I am so happy that Ai has added a slimline die set. This has 6 stacked dies. As a bonus, it includes a long flag die too. For today's card, I used the 3rd largest die for the main panel and stacked it on top of an orange panel cut with the 2nd largest die. I love the stitching and it matches all the other stitched die sets from Ai.
I haven't done a construction video for a while but I have one today! Click on the thumbnail below to see how I created this card.
Water and Dylusions Spray in White Linen was used on the inked panel before I arranged all the pieces on it. The critter wagon (as I like to call it) was mounted with double sided foam tape. I cut the webs out of black glitter cardstock and attached them and the other images to the panel with Art Glitter Glue. I have to say that I adore the hanging bat from the set. I think he could carry a card all by himself, he's so cute! He even has tiny little fangs. The last thing I did was stamp the sentiment Trick Or Treat on the bottom of the card using a phrase from the Halloween Critters Set.
Thank you for stopping by today. I hope I've encouraged you to check out all the new releases from the past two weeks at the Ai store. There's more coming so keep your eyes and ears on! You're going to love the new designs. In the meantime, join us in the slimline card challenge going on now through Wednesday next week. You could win up to three sets of your choice!

Let's Make Some Panda-Monium!
Happy Saturday everyone! Today I'm playing along with the Ai Lions, Tigers & Bears challenge by making this panda bear inspired card. It's not quite an envelope card and it's not quite a typical card. It's an insert card with a fun decorated pocket.
Back to the Office!
This fall, many of us are heading back to work sites. Art Impressions has several office themed sets and one that I get a kick out of is called Office Party. You can see from the photo of the set below that there's lots of fun images and sentiments that are perfect for the smart alecks of the office.
Funky Fancy Fold - Triangle Pop-Up
I decorated this card with images from the Whisk It Set #5001. I love all the stamps but my favorite is the stove with a batter bowl and a loaf of bread baking inside. So cute! I colored all the images with Copic markers. The retro blue/green & yellow color combos I used can be found at the end of this post.
This isn't a difficult fold once you understand it. However, it's just "funky" enough that it takes a bit for most people to know how to fold it out to display. For this reason, I recommend giving this card in person so you can show them how it goes together.
At the top of this post is how the card looks when it's fully open. To display this, you open it all up and then move the right bottom quadrant on top of the left lower quadrant. There is a set of magnets that will find each other. They hold everything in place and that's all there is to setting it up for display.
It's a little more complicated to fold it back up. Everything you see below is the inside of the card. The bottom half is split. The bottom half is split only to the middle and it has to be this way in order to pivot the bottom right quadrant on top of the bottom left quadrant for display.
My video shows the major steps and how to fold and unfold this card in real time. I walk through all the pieces and how to do the final assembly as well. Just click below to see it.
To further assist you, I have made a list of paper pieces with sizes needed and a diagram that shows where the pieces are placed on the 8" x 8" card base. The numbers correspond to the diagram where applicable. I had to make this for myself to keep it all straight since there are so many pieces and layers. Hopefully, you'll find this helpful too.
Paper Dimensions and Cutting Directions:
- Cut a square out of base card cardstock - 8" x 8" square. The square in Diagram A is this piece.
- Cut a white square - 3 7/8" for card front. Also cut a main pattern square - 3 3/4." Glue together.
- Cut a white square - 3 7/8" for left bottom quadrant.
- Cut a white square - 3 7/8." Also cut a main pattern paper square - 3 3/4." Glue together for placement on bottom right quadrant.
- Cut a white square - 3 3/4." Also cut a main pattern square - 3 1/2." Cut both squares in half and glue the patterned triangles on the white cardstock to create two matted triangles.
- Do the same as step 6 using a contrast pattern square. Cut both squares in half and glue the patterned triangles on the white cardstock to create two matted triangles.
- Cut a rectangle out of base card stock - 6" x 3 1/2." This is the easel mechanism and it's shown in the diagram under the square. On long side, score at 3" and 4 1/2." Fold in half and place circle die on top so part of the die overhangs a small part of the fold. Cut and then fold the 4 1/2" score line to create the easel part of the mechanism.
- Cut a square out of base card stock - 3 1/2." Use it to cut out a circle using the same die as in step 7. Glue this to the bottom half of the easel part of the easel mechanism. The top half of this circle should not be glued to anything but the lower half of the easel mechanism.
- Cut a circle using the die large enough to fit your sentiment. Mat it with another circle slightly larger. Glue together and attach it in the easel mechanism so that it will catch the easel section and support it to display upright. Make sure that nothing catches or is in the way before you permanently glue it in the card.
Retro Blue/Green Combo: B01, BG15 and BG45
Yellow Combo:YG00,Y02 and Y13
If you want to play along with this challenge, you can follow the link here to upload your card. The winner receives three stamp sets which is a very generous prize! You don't have to use Art Impressions stamps but you do get extra points if you do. Head on over to the challenge post and show off your work! I can't wait to see it!

Wild Child! Copic Coloring Tips & No Mess Alcohol Ink Background!
Hello everyone! Today I'm here with the super fun Hats Off Mrs. Set. This card is bold, bright, colorful and full of sass! Just the way I like it and why I enjoy Art Impression stamps so much.
This image was Copic colored. The colors used are at the end of this post for your convenience. Of course, this would be fun in all kinds of color combinations so pick your favorite colors and markers, paints, or pencils and have a go at it.
I chose a patterned paper background that is full of color and sets off this wild child well. I also used a circle of vellum with a paper frame to help make her detailed hat the focal point of the card. I used the rectangle, circle and flag double stitched dies on this card. Have you tried the flag dies for sentiments? They work really great for them and as accents too.
A bit more on the background I used. The colorful background is a printed cardstock. I discovered this paper pack from Craft Consortium called Ink Drops - Vivid. There are many different versions and colorways in the Ink Drops line. For anyone who is intimidated by using alcohol inks or who doesn't want to invest in all the supplies, or simply doesn't want the mess - this is a perfect way to get a gorgeous alcohol ink look with zero effort. I'm so excited to have run into this paper. I love, love it!
I have a tutorial video for this card so stop by and pick up some Copic coloring tips I share that apply to this and other images you might be coloring.
Thanks for stopping by today. I hope you enjoyed looking at this card idea. See you next week!

My "Coffee" Cup Runneth Over For You!
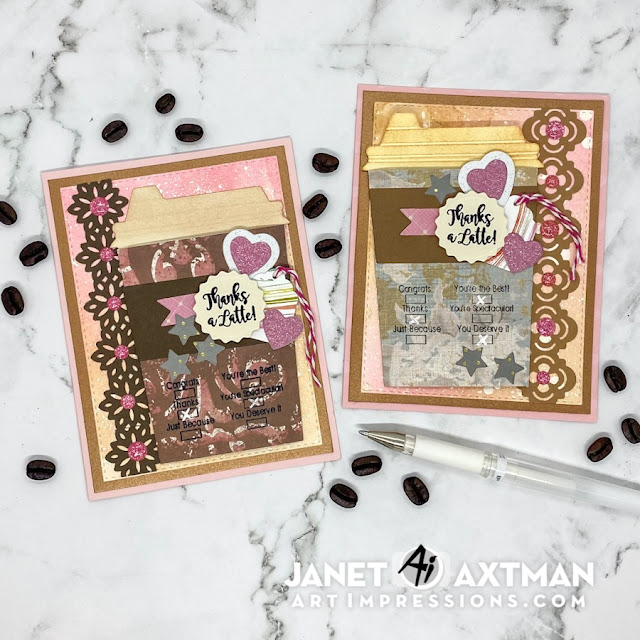
A Latte To Love In These Gift Card Holders!


