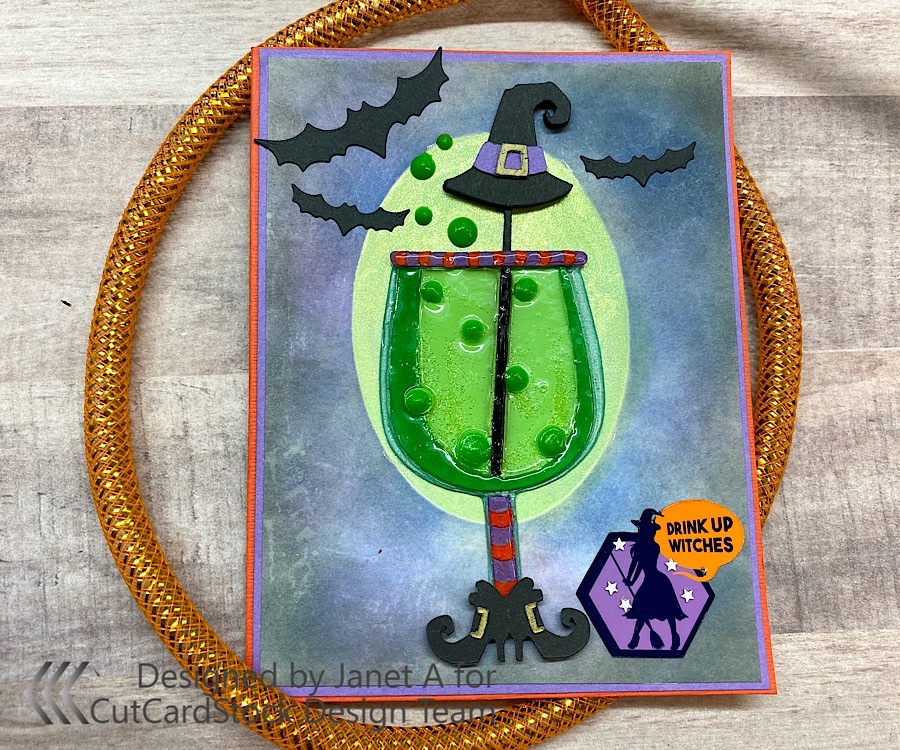
Mix yourself up a ghoulishly fun Halloween card with CutCardStock and a few other supplies. This one has a few steps but is so totally worth it to get the look of a transparent glass complete with fizz, bubbles and a few bats to spare!
Because this is hard to get a good photo of, I've made a video tutorial for you. There you can see much better how cool the drink looks on this card.
The A2 card base is formed using Odobo Orange cardstock. It's also used for the goblet rim and stem. The goblet's base shape is made with Stardream Metallic Lagoon. Pop Tones Grape Jelly is used for the card panel mat, the witch's hat band, goblet rim and goblet stem accents. The hat, boots and bats are Basis Black cardstock. The green liquid is Pop Tones Limeade Cardstock. The main card panel is Neenah Classic Crest Solar White. Smaller bits of that were also used for the buckles. To get a metallic look, I colored them with a gold paint marker.
To ink the card panel, I started by covering it with Antique Linen Distress Ink. Then I applied an oval paper mask so I could ink up the night sky around the "glow" without covering it up. After the Antique Linen, I used Oxide inks in Blueprint Sketch, Wilted Violet and Black Soot. Then I removed the oval mask and applied the negative mask from the oval cut so I could work just on the glow element while protecting the dark areas I had already blended.
To make this area glow and also seem to cast light through the goblet, I needed to make it a bit more green than the Antique Linen by itself. I blended a coat of Cracked Pistachio Oxide ink first. Then I applied a coating of Cosmic Shimmer Opal Blaze Polish in Gilded Avacado. This gave it the perfect greenish glow!
I found the goblet cut file in the Silhouette store but if you don't have a Cameo, you can purchase this file as an .svg and use it on any cutting machine that accepts an .svg file. Except for the main glass goblet shape, I glued 2 layers together to form a more substantial die cut. The hat drink stirrer has three layers so that the stir section looks more dimensional. I applied a fourth hat layer on foam tape for additional dimension. The boots are also lifted on foam tape.
Inside the glass, I applied small areas of glue at the bottom and in vertical lines to the top. Then I applied microglitter in a lime color. I was aiming to create a fizzy look with the glitter. I then applied the cut bubble pieces in the areas of the glitter so the bubbles are coming up with the fizz.
Next I covered the entire goblet with Glossy Accents. The cut cardstock bubbles resisted being covered due to their height and this was another reason I put them on even though I would cover them up eventually. Once dried, I used Beads in a Bottle in Peridot on the bubble cuts. I also applied a few bubbles outside of the glass using the Beads in a Bottle. Then I applied the bat die cuts.
My sentiment was made from a Cricut File. It is the witch figure and the speech bubble. I placed her on a purple and black octagon and converted it to a print then cut graphic. Look for cut #M10001F4A in Design Space.
This is a fun card to make and looks great when completed. Unfortunately, it is hard to get a great picture of it because of the shimmer and shine on and around the goblet. I hope you'll give it a try!


