Have you noticed that striped cardstock backgrounds are popping up everywhere in the card design world? It's such a simple technique and gives a fresh clean architectural look. This 5" x 7" card uses CutCardstock's Stardream Metallic Cardstocks to create a beautiful background and as inlay for chunky outline dies along with CCS Silver Glitter Cardstock and CCS Bright Silver Foil cardstocks.
As I've mentioned in previous posts, my absolute favorite colors for Christmas is traditional red, green and white. Once in while, I have to switch it out and go to pastels for something just a little different and a bit more contemporary. This cardstyle with varying strips of color and chunky outline words & shapes are really well suited to a more modern palette.
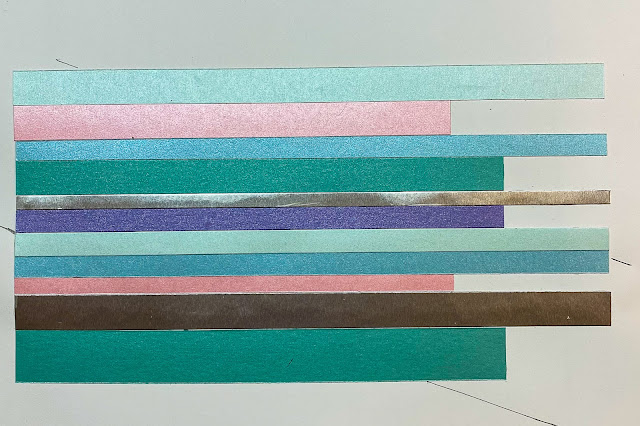
It can be hard to choose several colors and have them work well together. If you're not a trained artist, it can be especially difficult unless you just happen to have great color sense naturally. Alas, I am not trained or born with natural color sense! What's a girl to do? I rely on my trusty Dritz Rainbow Color Selector Wheel to help me choose colors that work well together, making sure their values are similar for best color harmony. If you don't have a color wheel to help you choose colors, I highly recommend one. It helps take the guesswork out and it virtually guarantees your colors work well together. In this case, I used the following Stardream Metallic Cardstocks: Aquamarine, Blue Topaz, Lagoon, Rose Quartz & Amethyst. I also used CCS Bright Silver Foil Cardstock. This is a wonderful cardstock line. It has a glowing finish on both sides and is heavy but not too heavy. It cuts well with either a trimmer, electronic cutter or metal dies.I started by slicing several pieces in varying lengths from all the above mentioned cardstocks. Then I layed them out horizontally making sure to use varying widths and alternating colors and glued them onto white printer paper. I used all the colors mentioned in the background except for the glitter cardstock in the background. Next I cut a rectangle sized 2 1/2" x 6" at an angle. You can see angled lines on the left and right of the strips in the photo. These were measured and marked with a pencil so I could use my paper trimmer to get the desired width and angle.
I then used two new STAMPtember dies from Simons Says Stamp! The holly comes from the Chunky Trees and Holly set. The word is called Chunky Merry. These are perfect chunky outline style dies that make inlay super easy to do. I cut the backgrounds in Lagoon and the outline in CCS Bright Silver Foil Cardstock. I made another pass of the Merry die in Rose Quartz so that I had pieces that I could inlay into the word outline. For the Holly, I made additional passes in Aquamarine for inlaid leaves and Rose Quartz for inlaid berries. Once cut, I assembled the die cuts and inlaid the pieces into the outlines of the die cuts.I made a 5" x 7" card base from Royal Sundance Felt, Brilliant White. I love this crisp clean cardstock. It has a canvas finish and makes any card feel really rich. As an added bonus, it prints beautifully when run through an ink jet printer. I did not print on it this time but have before. If you want to see how it prints, you can follow this link to a post where I printed pieces for a shaker box project.
After scoring my card base, I glued the background strip on the base and trimmed off the excess so that it was flush to each side of the card. Then I placed border strips of CCS Silver Glitter Cardstock to the top and bottom of the background. Finally, I lifted the Merry word and holly on foam tape and placed them on the background. I just love the contrast of the metallic & glitter cardstock against that crisply textured card base.
Thanks for joining me today for this clean & simple card. Remember that using strips of cardstock for backgrounds or even to create paper to be used with die cuts can be done for all types and styles of cards. It's a great use of scraps too. Have a wonderful day!
- Janet


No comments